How To: Add Better Lighting Effects to Portrait Mode Photos on Your iPhone
Apple first included a dual-lens camera onto its iPhone 7 Plus back in late-2016, yet not many developers besides Apple have harnessed the depth data that "Portrait" mode photos provide. A relatively new app is changing that, though, by using that depth information to let you add realistic-looking light sources to your photos.Created by Indice Ltd and first released in the iOS App Store on May 18, 2018, "Apollo: Immersive illumination" works with photos taken in Portrait mode on the iPhone 7 Plus, iPhone 8 Plus, and iPhone X. It also works with Portrait lighting modes, though, Apple's lighting effects that you use will be removed before Apollo can work its magic; You can't add Apollo effects on top of Apple's lighting effects.Don't Miss: How to Use Portrait Lighting Mode on the iPhone X, 8 PlusWith this app, you can add up to 20 different light sources to any image it can read the depth information for. As for editing, there are two global settings you can adjust on the whole photo (shadows and effect range), as well as four parameters you can calibrate for each light source (color, distance, brightness, and spread).Apollo is the first app to use the depth data of your portrait mode photos to calculate photorealistic lighting. Using a proprietary graphics card processing algorithm, Apollo is able to illuminate a portrait scene in real time. Load up a photo from your gallery and start adding lights. Apollo will realistically calculate the effect of the light's distance, color, intensity etc.
— Indice LtdApollo does cost $1.99, but if you're a photo enthusiast that wants to make your subjects pop with realistic lighting effects, create a different mood in the picture, or add halos and emphasize silhouettes, it's an excellent investment.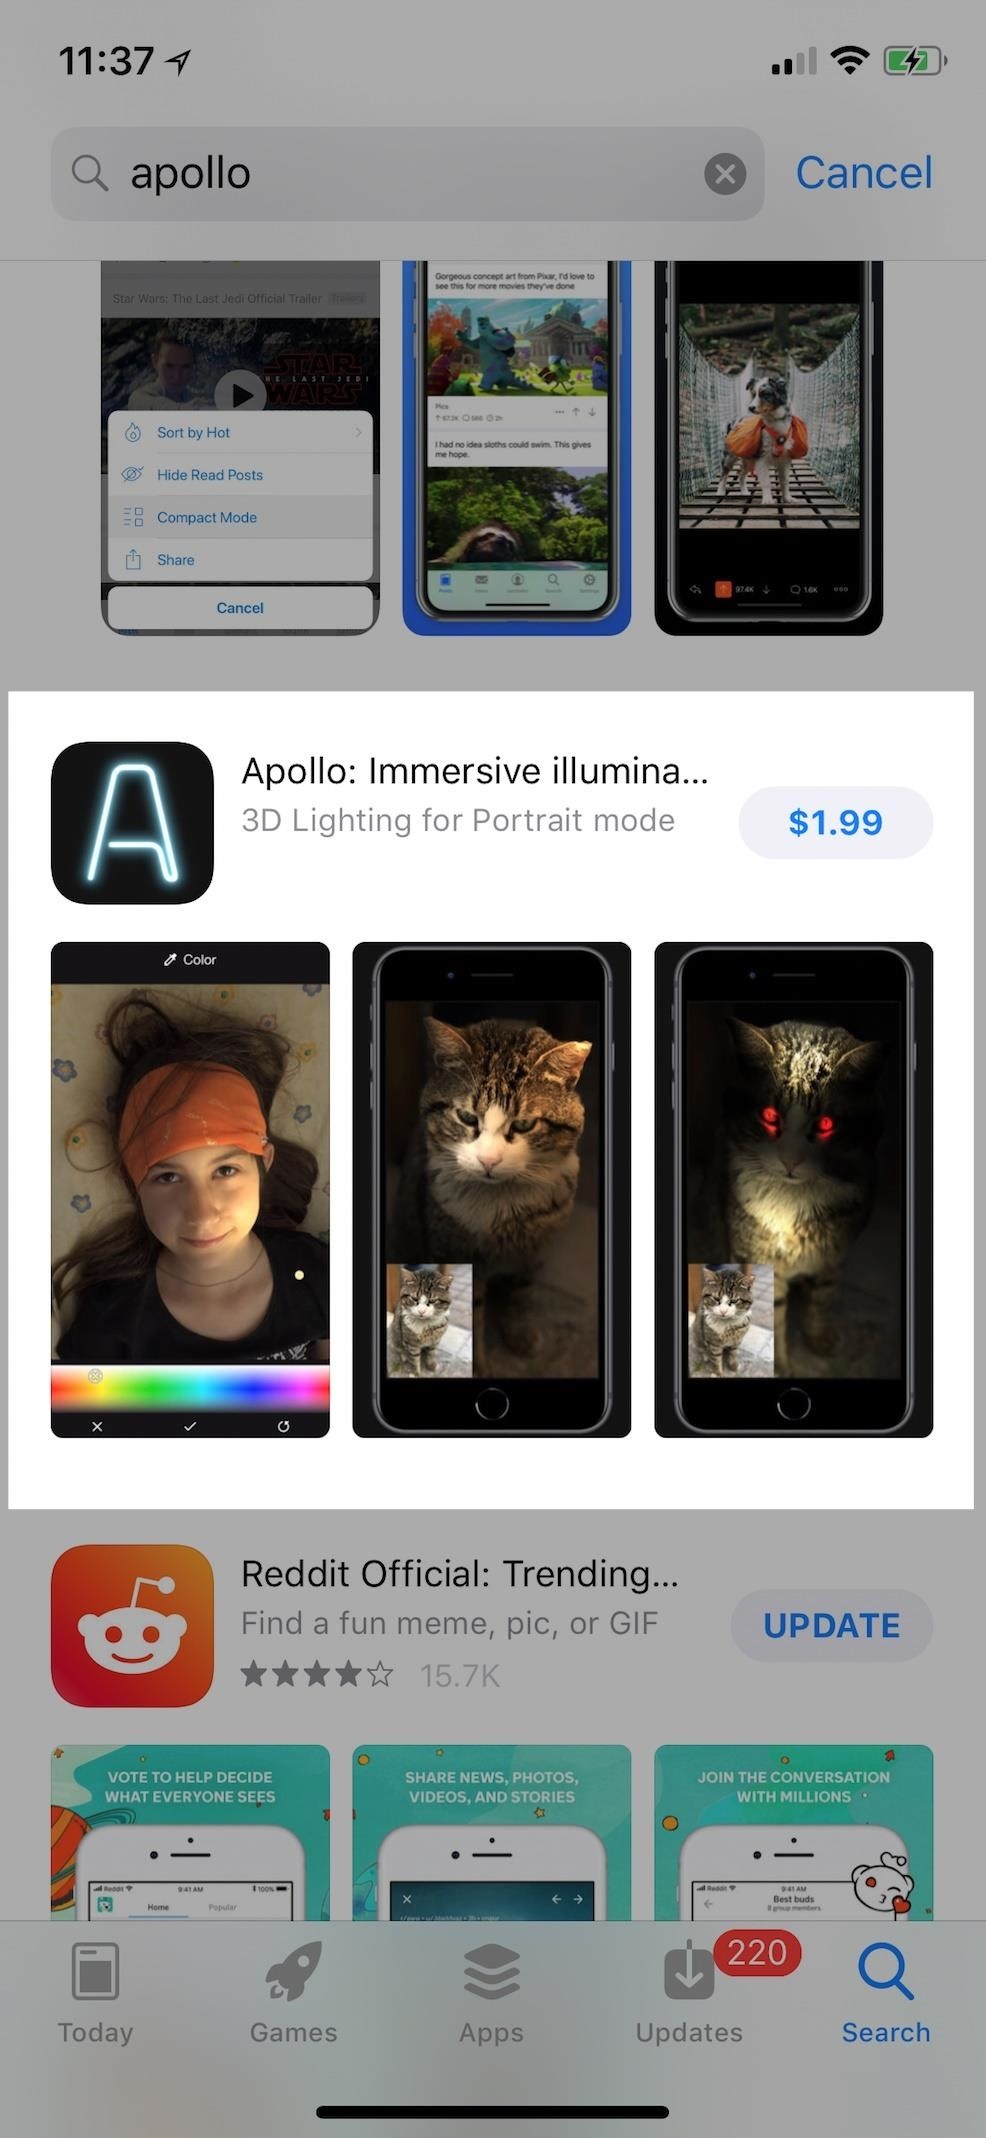
Step 1: Install ApolloIf you haven't done so already, jump into the App Store to purchase and install "Apollo: Immersive illumination" on your iPhone. Remember, this is only for the 7 Plus, 8 Plus, and X — iPhones with dual-lens cameras.Install Apollo: Immersive illumination for $1.99 from the iOS App Store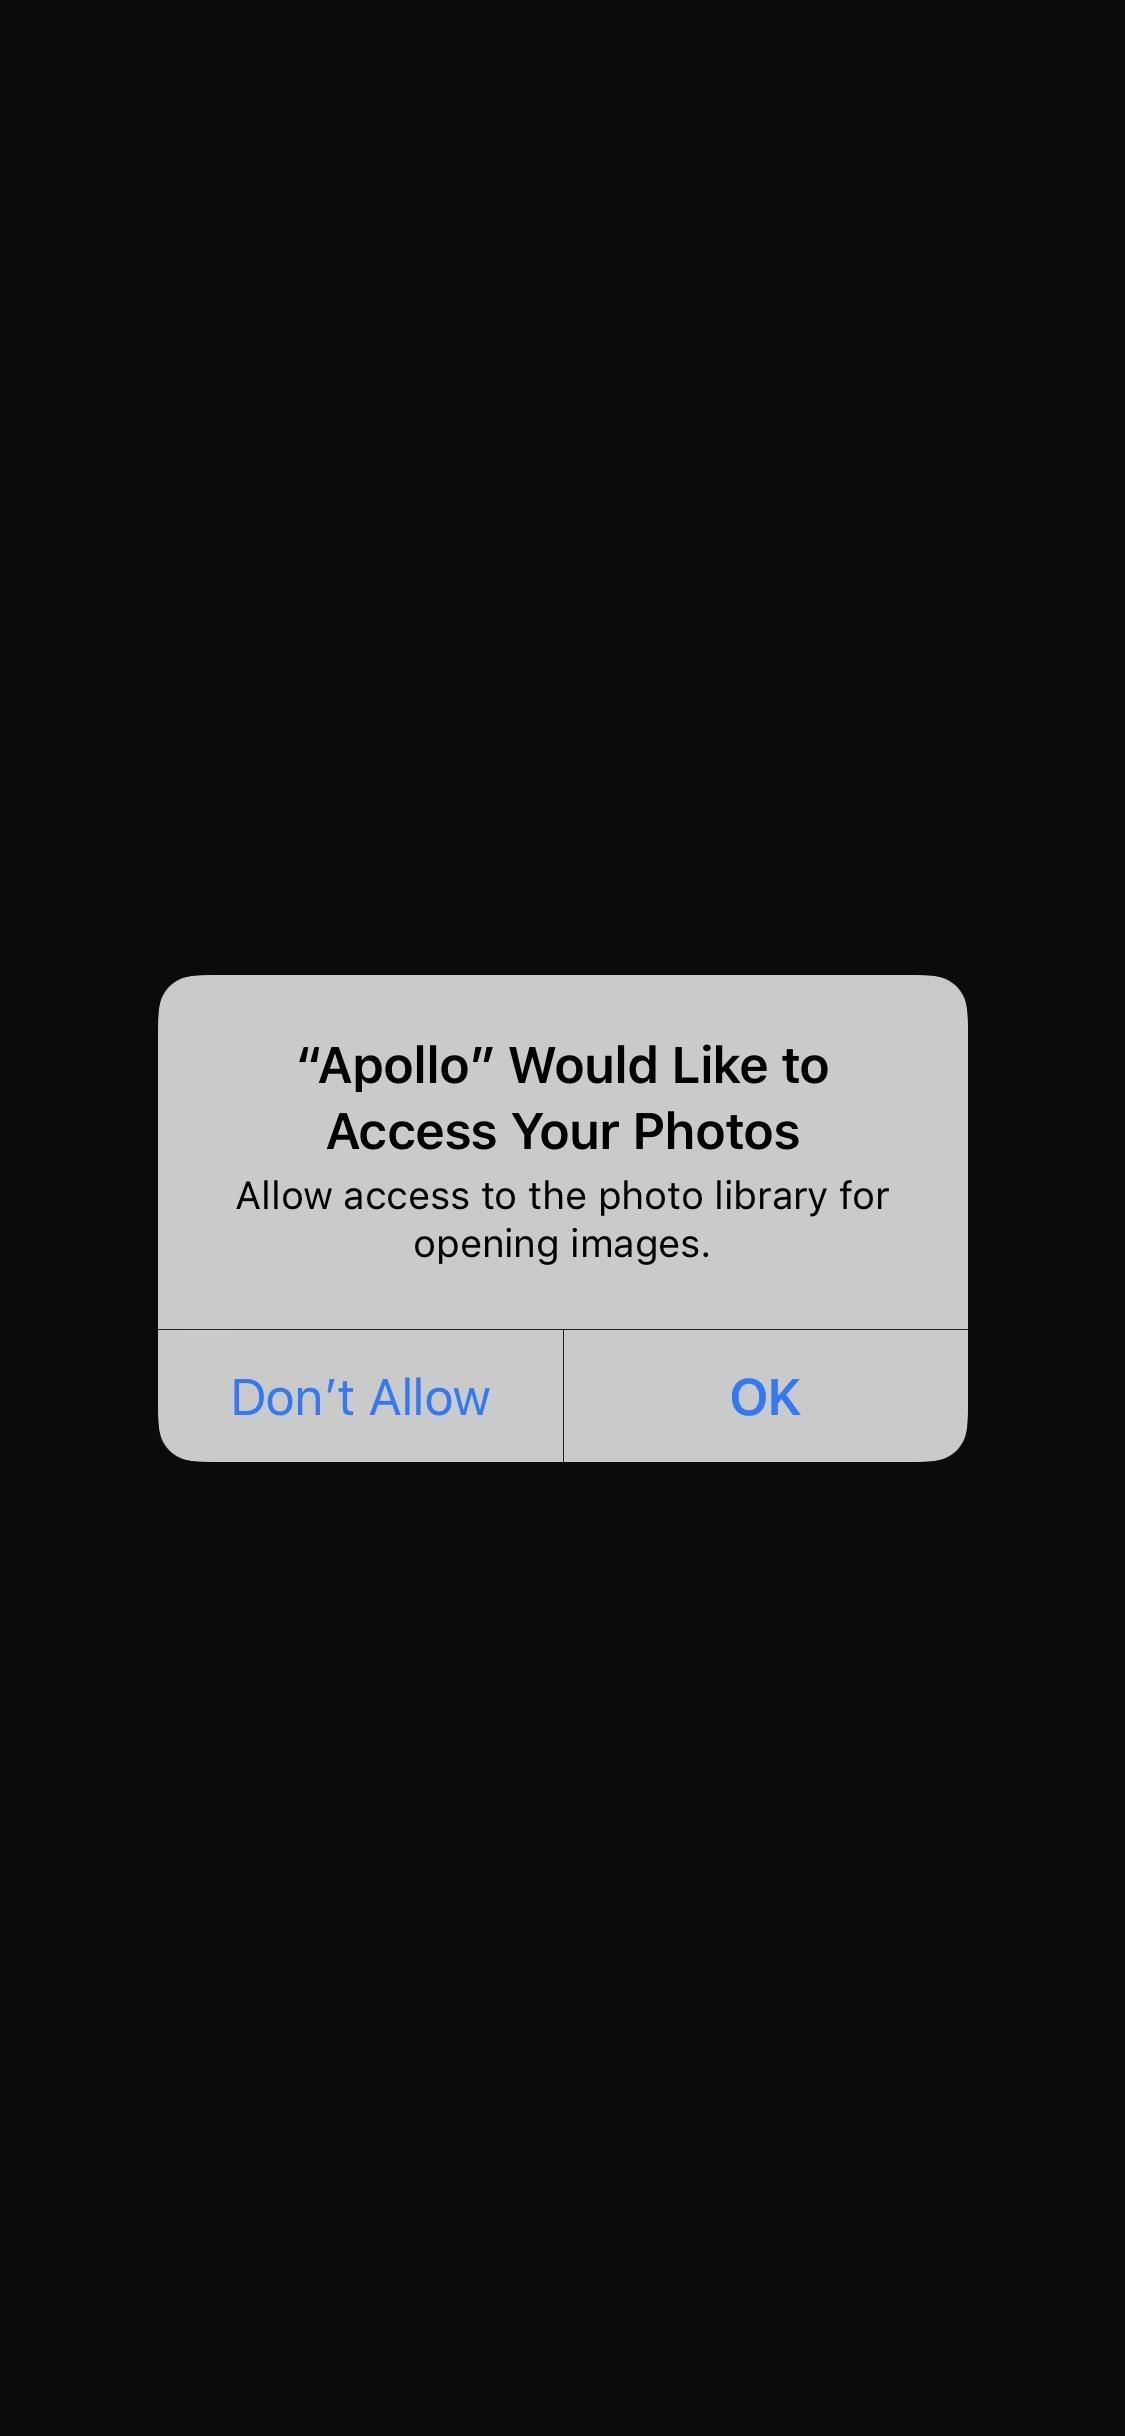
Step 2: Find the Photo That You WantWhen you first open up Apollo on your iPhone, you'll need to grant the app access to your photo library, so go ahead and do so. Once done, you'll get a quick explanation of what type of Portrait mode images work best.The photo should have uniform lighting — no hard shadows or strong highlights. Low lighting photos, photos taken under an overcast sky, or selfies and closeups are perfect candidates. A crisp and steady photo results in crisp customized lighting. Practice makes perfect! Although Apollo is built with simplicity in mind, mastering its concepts may take some time. After tapping "OK" to dismiss the hints, you'll be taken right to the Library Photos page which only includes Portrait mode pics you took, that way you don't have to dig around trying to find a Portrait mode photo among all your other pics. Tap on the one you want to add lighting effects to and you'll be brought to the lighting editor.Don't Miss: How to Find the Normal Photos for Your Portrait Mode Images in iOS 11If the photo fails to meet some of the guidelines mentioned above, you may get a warning that "Apollo cannot process this photo," so you'll have to try another one or retake the photo if possible.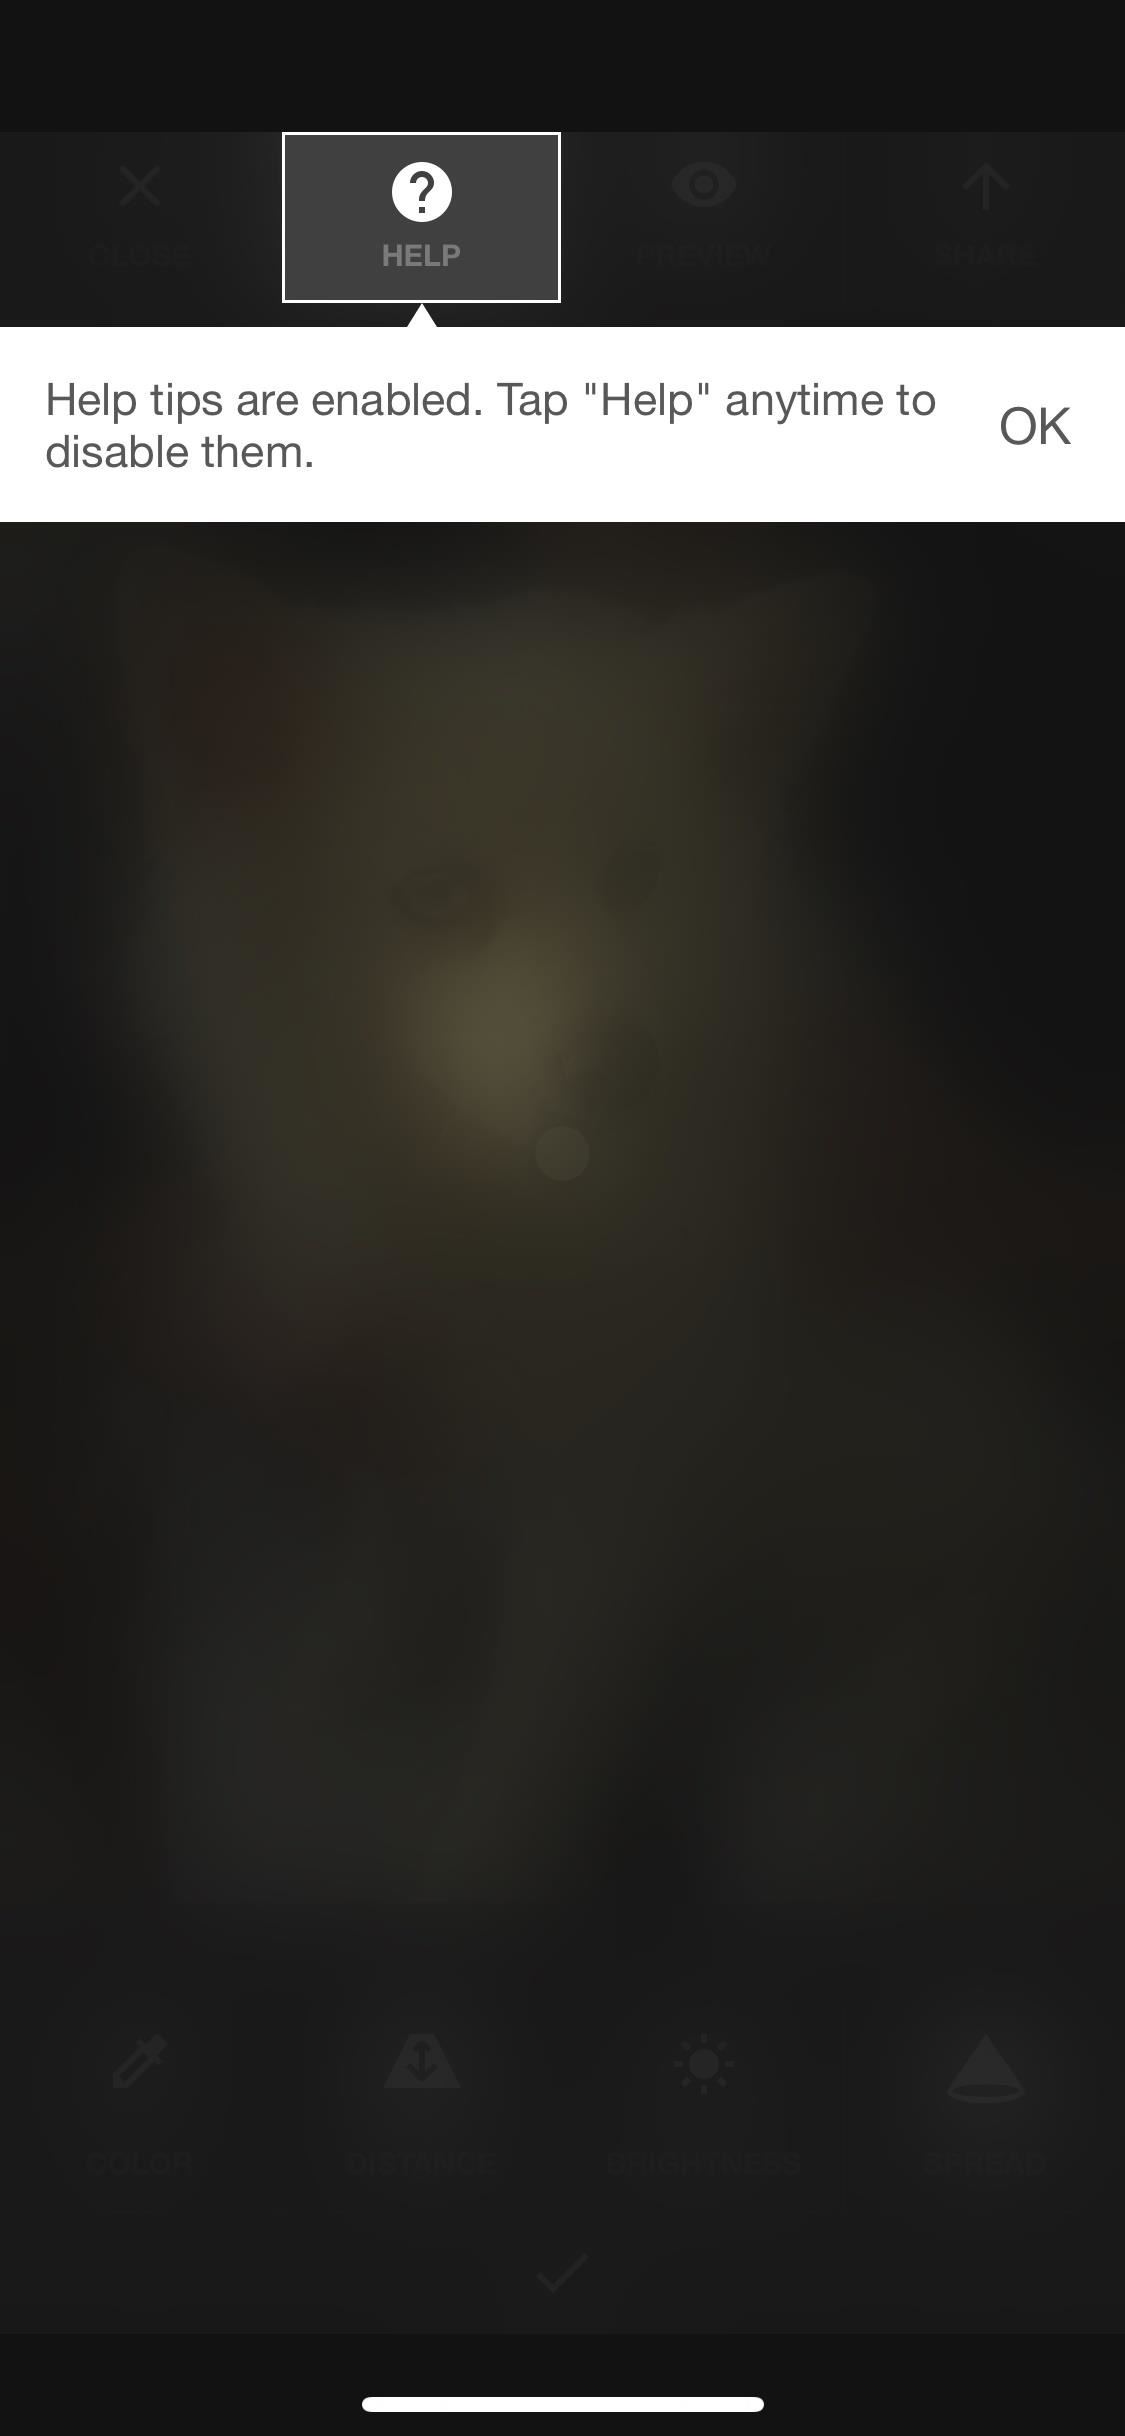
Step 3: Use the Help Tool to Learn the RopesI won't go into too much detail about to how to use Apollo since the app itself has a great help tool available and because half the fun is playing around and experimenting with different options and multiple light sources.As for those help tools, when you first start playing around, you'll see prompts right away that tells you how to interact with each tool available to you. You can dismiss these tools by tapping "Help" up top, and any time you forget how to use a particular tool you can reactivate the guidance by tapping "Help" again.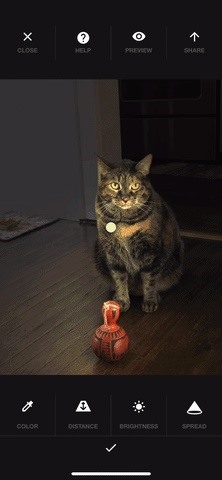
Step 4: Add Lighting EffectsLike I mentioned in the previous step, experimenting is the best way to get used to everything that Apollo can do to your images. Once you start playing around and seeing what you can do with lighting effects, you can begin shooting Portrait mode photos with Apollo in mind, shooting new images knowing exactly where you plan on putting new light sources and effects when editing.Light sources are represented by hollowed circles unless they are selected, then they are solid color dots. When editing a light source, you can change its location by moving the dot around. You use the toolbar at the bottom to adjust color (the temperature of the light), distance (in 3D space ... you can even place it behind an object to create halos and silhouettes), brightness (intensity), and spread (like a flashlight's adjustable focus).When you tap on the checkmark, you'll be able to create another light source (with the + button) or select another to edit (tap a circle), as well as adjust the amount of shadows that are automatically added to the whole image as well as the effect range overall. Tapping on the trash can icon when editing a specific light source will remove it from the draft.
Step 5: Preview the Original vs. ChangesAt any time, you can tap "Preview" up top to see the image by itself. If you double-tap the picture, it'll either zoom in or out. You can also pinch to zoom in and out. A long-press on the image will reveal the original image underneath all the added effects, so you can quickly compare which you like best. Once you're satisfied with your lighting scene, you can tap the "Share" button up top after exiting "Preview" mode to bring up the standard share sheet to send to other apps, copy, print, save, etc.If you want to know more of the backstory behind Apollo and how it came to be, read the developer's "behind-the-app" post on Reddit. They've been working on the app ever since November 2017, so there have been six solid months of development before Apollo was released.Don't Miss: How to Stop Portrait Mode from Eating Up Space on Your iPhoneFollow Gadget Hacks on Facebook, Twitter, YouTube, and Flipboard Follow WonderHowTo on Facebook, Twitter, Pinterest, and Flipboard
Cover photo and screenshots by Justin Meyers/Gadget Hacks
How to Block a Website with Firefox Add-ons. Firefox add-ons are extensions that can be added to Firefox and carry out special functions. You can find them on Firefox website. Here we describe how to block a website with the most popular for this add-on BlockSite.
How To Block a Website On Firefox - YouTube
How to Use all the functions of the Droid X smartphone
Sent an email by mistake? Find out How To Recall an Email in Gmail. Unsend the message you sent by mistake in a few easy steps.
How To "Unsend" An Email in Gmail - YouTube
Hack lets you enable Personal Hotspot on your iPhone without jailbreaking Posted by iPhoneHacks on Jul 08, 2013 in Hacks , Hotspot Joseph Brown of iTweakiOS who has released hacked carrier bundles to boost download speeds, has just figured out a way to enable tethering (or the mobile Hotspot) feature on the iPhone without jailbreaking.
[Discussion] iPhone 6 tethering without jailbreak : jailbreak
Here we go again, softModders, it's time for another awesome tweak for your iPod, iPhone, or iPod running iOS 7. Have you ever felt like changing your lock screen with a custom text instead of it saying "slide to unlock"? Why shouldn't we be able to edit this? We're not given much freedom as it stands with our Apple devices.
How to Customize the Windows 10 Lock Screen - Gadget Hacks
I was able to make a macOS Sierra external USB boot disk in a few minutes, and the installation worked without a hitch. Also works with older versions of OS X. Diskmaker X is a popular app.
This video will show you how to disable the multitask and back button on any Samsung Galaxy device. Hope you enjoy please like and subscribe. Turn Your Galaxy S7 Into A Galaxy S8
Galaxy S10: Ten Features to Enable and Disable
To receive SMS, MMS, or push notifications from third-party apps on your Apple Watch Series 4 (GPS + Cellular) or Apple Watch Series 3 (GPS + Cellular), your paired iPhone must be powered on and connected to Wi-Fi or cellular, but it doesn't need to be nearby. You also need to be signed in to iMessage on your iPhone.
Enable MMS on iPad ? - Apple Community
You can calculate the distance between two or more points on the map. For example, you can measure the mileage in a straight line between two cities. On your computer, open Google Maps. If you're using Maps in Lite mode, you'll see a lightning bolt at the bottom and you won't be able to measure the distance between points.
Get Measurements for Area & Distances in Google Maps
With the list of available mobile apps for moviegoers constantly expanding and improving, seeing a film at your local theater has never been better. With the right apps for your iPhone or Android phone, you can research movies, find out if showings are sold out, reserve seats, save money on tickets and concessions, preorder popcorn and soda, and even find dull bathroom-worthy scenes.
13 Movie Theater Hacks To Make Your Moviegoing Experience Better
How To: Count Calories & Log Nutrition with Samsung Health How To: Change Your Step Count Goal in Samsung Health How To: 'Quick Add' Calories for Snacks in MyFitnessPal to Keep Yourself Accountable for Every Tiny Bite How To: 15 Tips to Help You Get the Most Out of Samsung Health
The 5 Best Meal Tracking Apps for Managing Your Diet
Step 7: Adjust display colors . Now that you are on the main screen to calibrate the display, you will see a number of settings to suit your needs. Below we will explain each feature to help you better understand the impact it has on your display.
How to calibrate the colors of your Pixel 2 screen with
0 comments:
Post a Comment