How To: Add a Google Cast Button to Your Quick Settings Tiles on Any Phone No Root Needed
Android's Quick Settings menu gives you easy access to certain actions from any screen, but the tiles available are largely dependent on your phone's OEM skin. For instance, the Google Cast button that can cast your entire screen has been exclusive to Nexus and Pixel devices, even though other phones have the requisite software to use it. Fortunately, there's a way to add it on any device running Nougat or higher.This Google Cast tile lets you mirror your phone's screen onto another device such as a TV, and all it takes in terms of hardware is a Chromecast or Google Cast-enabled device like an Android TV. Most media apps have built-in Google Cast support, but a few still don't — in these cases, the Google Cast tile will let you cast your entire screen using the Quick Settings. Luckily, there is an app that adds the Google Cast tile to any device, and it doesn't even require root.
Step 1: Install Nougat / Oreo Quick SettingsFirst, head to the Play Store and install the Nougat / Oreo Quick Settings app. This app allows you to add tiles to your Quick Settings as long as you are running Android 7.0 Nougat (or a newer version of Android).Install Nougat / Oreo Quick Settings for free from the Google Play Store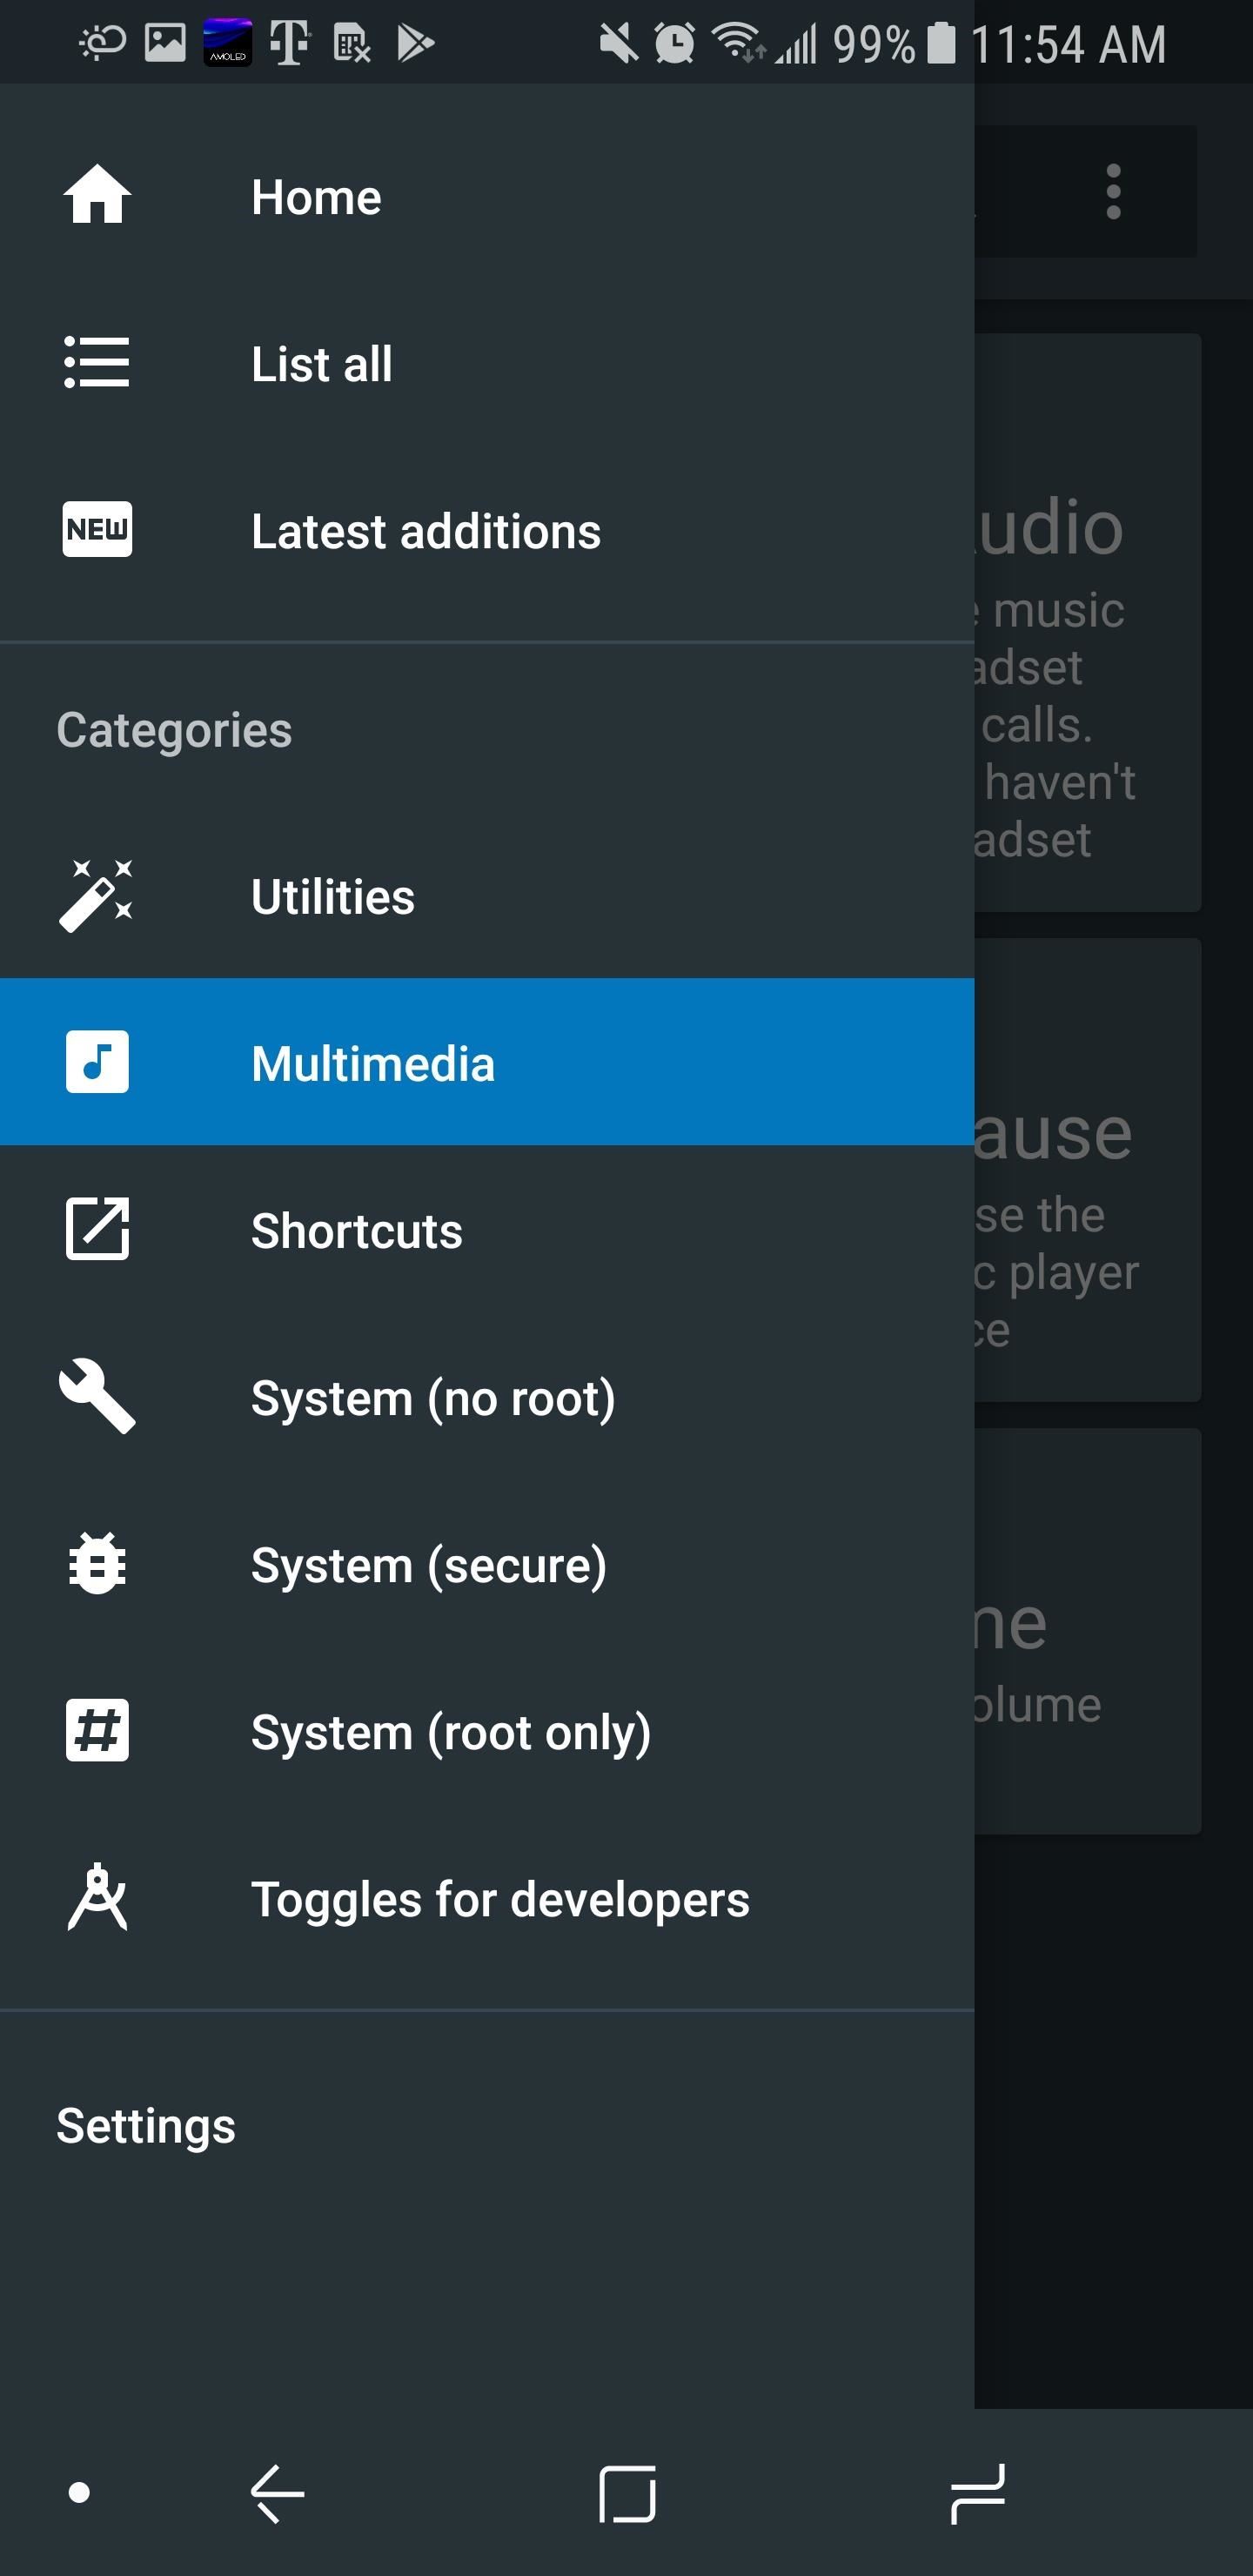
Step 2: Enable the Cast TileOnce installed, open the app and select the hamburger menu in the upper-left corner, then choose "Multimedia". You will be presented with a list of media-centric tiles that you can add to your Quick Settings. Select "Cast" and choose "Enable toggle," then tap "OK" on the popup to activate the tile.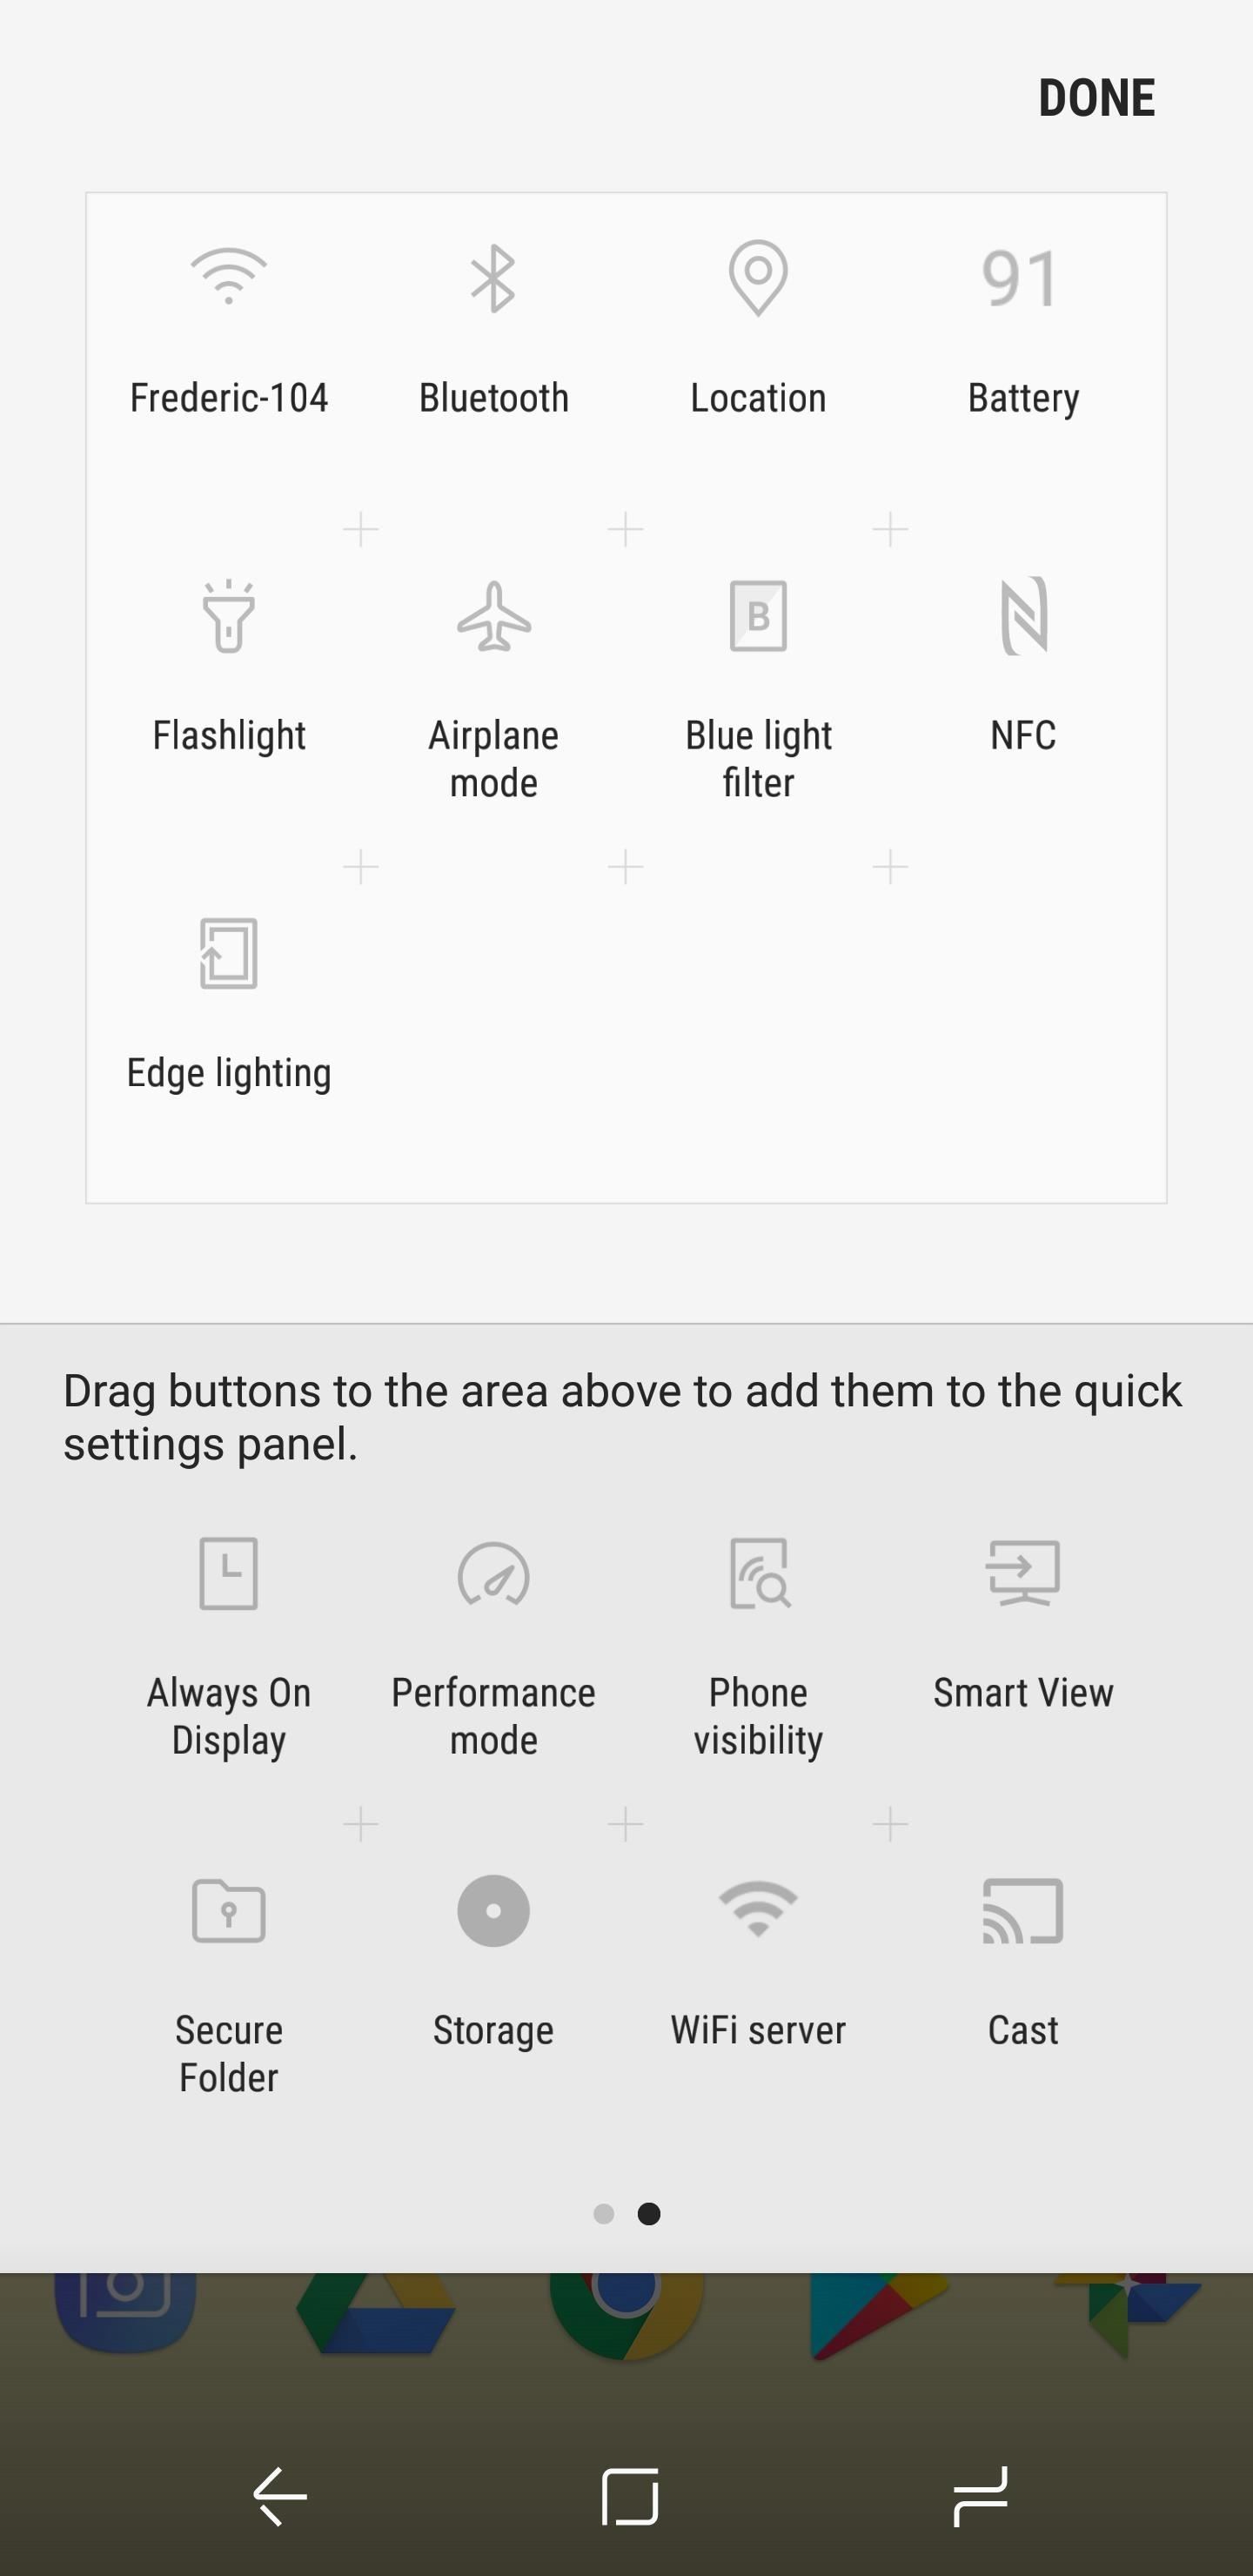
Step 3: Add the Cast Tile to Your Quick Settings MenuNow when you open your Quick Settings menu by swiping down from the top of any screen, you will not see the tile — this is because you need to add it first. Depending on your OEM skin, the process of adding the tile may vary.To start, swipe down twice from the top of any screen to fully expand your Quick Settings menu. From here, look for a three-dot menu button, a pencil icon, or an "Edit" button. It may be in the top-right next to the gear icon or towards the bottom-right. Once you've found this button, tap it to open edit mode.From here, you'll see your active Quick Settings tiles at the top with a list of inactive icons beneath them. You may have to scroll down a bit, but find the new "Cast" tile in the lower area, which looks like a TV with the Wi-Fi logo in one corner. Once you've found the tile, long-press it, then drag it up to the top portion of this menu where your active Quick Settings tiles were. From there, tap "Done" or "Save," then you'll have Google Cast tile in your Quick Settings menu.
Step 4: Add Additional Tiles (Optional)This app isn't just about the Cast tile — it has a large list of shortcuts that can also be added to your Quick Settings menu. Only two categories of tiles require root access, with the rest available to any device running Android 7.0 or higher. The screenshots below show some of the available tiles, and you can find these by browsing the various sections in the app's hamburger menu. For a suggestion of other tiles to add, I recommend the "Caffeine" tile under Utilities. Adding it is as simple as repeating Steps 2 and 3 above, and when it's enabled, you can keep your screen on indefinitely by tapping the tile, regardless of the automatic screen timeout you choose in Settings. I cannot tell you how useful this feature has been for me. Another great one is the "Battery" tile under Utilities. Unfortunately, not all skins come with a tile that shows battery level, so this is a perfect replacement if your phone doesn't have such a tile already. I find it useful as a quick way to enter the battery menu to see my current screen on time.
Step 5: Cast Your Screen from the Quick Settings MenuFrom now on, whenever you need to cast something on your screen — say, for instance, an app that doesn't natively support Google Cast like Amazon Video — just open your Quick Settings menu by swiping down from the top of any screen. From there, tap the Cast tile, then select your Chromecast or Google Cast-compatible device from the list. With the Cast tile, you can easily mirror your display no matter what app you're using. Some apps (such as many TV providers' apps) specifically block Google Cast, so this won't get around that. However, for many apps in which the developers didn't think to add casting features, this is a perfect way to view your smartphone's content on another device. What tiles did you add to your Quick Settings? Let us know in the comments below.Don't Miss: How to Use Android Instant AppsFollow Gadget Hacks on Facebook, Twitter, Google+, YouTube, and Instagram Follow WonderHowTo on Facebook, Twitter, Pinterest, and Google+
Cover image and screenshots by Jon Knight/Gadget Hacks
How To Enable Chromecast Screen Mirroring On Any Android Device By Ben Reid | July 12th, 2014 This year's Google I/O may have been dominated by the search giant's grand unveiling of Android L, but there were still plenty of other major announcements besides.
[EXPERIMENTAL] Enable Mirroring from any dev… | Android TV
Acid 2 tests for compatibility with new features in the HTML, CSS, and PNG standards. Pioneering the standardization effort, Safari passed Acid 2 on October 27, 2005 — two and a half years before any other popular browser. Acid 3 Compliance. Safari was the first web browser to pass Acid 3.
Apple Safari - Free download and software reviews - CNET
In the revamped Messages app in iOS 10, you can now send animated GIFs from your iPad, iPhone, or iPod touch without a third-party keyboard like Giphy or GIF Keyboard. Best of all, this is not just an iMessage-only feature. We tested it out and were able to send animated GIFs to Android users via
Send and save GIFs on your iPhone, iPad, or iPod touch
Report Ad
Top Rated: Faster Connection to Restricted Sites, World's Biggest VPN Network. Best VPN for Streaming, Anonymity & Security. Try HMA VPN for free!
Access your favourite content worldwide.
How-To Tips and tricks to get the most out of your Galaxy S9 camera. Don't worry - the camera app might look a bit complicated at first, but you'll be able to master it in a matter of minutes.
Five tips to make your Nexus 5 even better - CNET
Jan 18, 2018 · How can I remove unwanted apps from Windows 10? and remove ones you don't. Windows Media Player and IE11 appear here, though I recommend keeping both. Paid-for apps include Nebo, for
12 Dangerous Android Apps You Need to Delete Immediately
How to Download Photos from Your iPhone to a Computer. This wikiHow teaches you how to move photos from your iPhone onto a Windows or Mac computer. You can do this by using your respective computer's built-in Photos application, or you can
We think this project is fun and is a great way to upcycle an Altoids Sours tin and some old computer fan guards. Although it would not be the ideal grill for cooking up a group dinner, it sure would make for a great marshmallow toaster and you cannot beat the portability.
This DIY Altoids Mini BBQ Grill Is Curiously Awesome
How to Make a Simple Lemon Battery: 4 Steps
How to synchronize Kindle collections across all devices
How To Put An iPhone In DFU Mode. Plug your iPhone into your computer and open iTunes. It doesn't matter if your iPhone is on or off. Press and hold the Sleep / Wake Button and Home Button (iPhone 6s and below) or the volume down button (iPhone 7) together for 8 seconds.
0 comments:
Post a Comment