How To: Create a Strong (Or Stronger) Passcode for Your iPhone
When you first set up an iPhone, you'll be prompted to create a six-digit passcode to unlock your screen and access certain system settings. If you skip this step, you can always go back and create one, which we highly recommend. Without a passcode, everything on your iPhone is accessible by anyone who gets their hands on it — nosey friends, hackers, thieves, local law enforcement, the FBI — and you don't want that, do you?After you add a passcode, you'll need it every time you unlock your iPhone unless you have Face ID or Touch ID set up. Even if you have biometric options set up, if they are disabled for whatever reason, you'll need your passcode to reactivate them. You'll also need a passcode after turning on or restarting your iPhone, updating your software, erasing your device, viewing or changing passcode settings, and installing iOS configuration profiles. This is all pretty important, so I hope you can see why you'd want a passcode on your iPhone.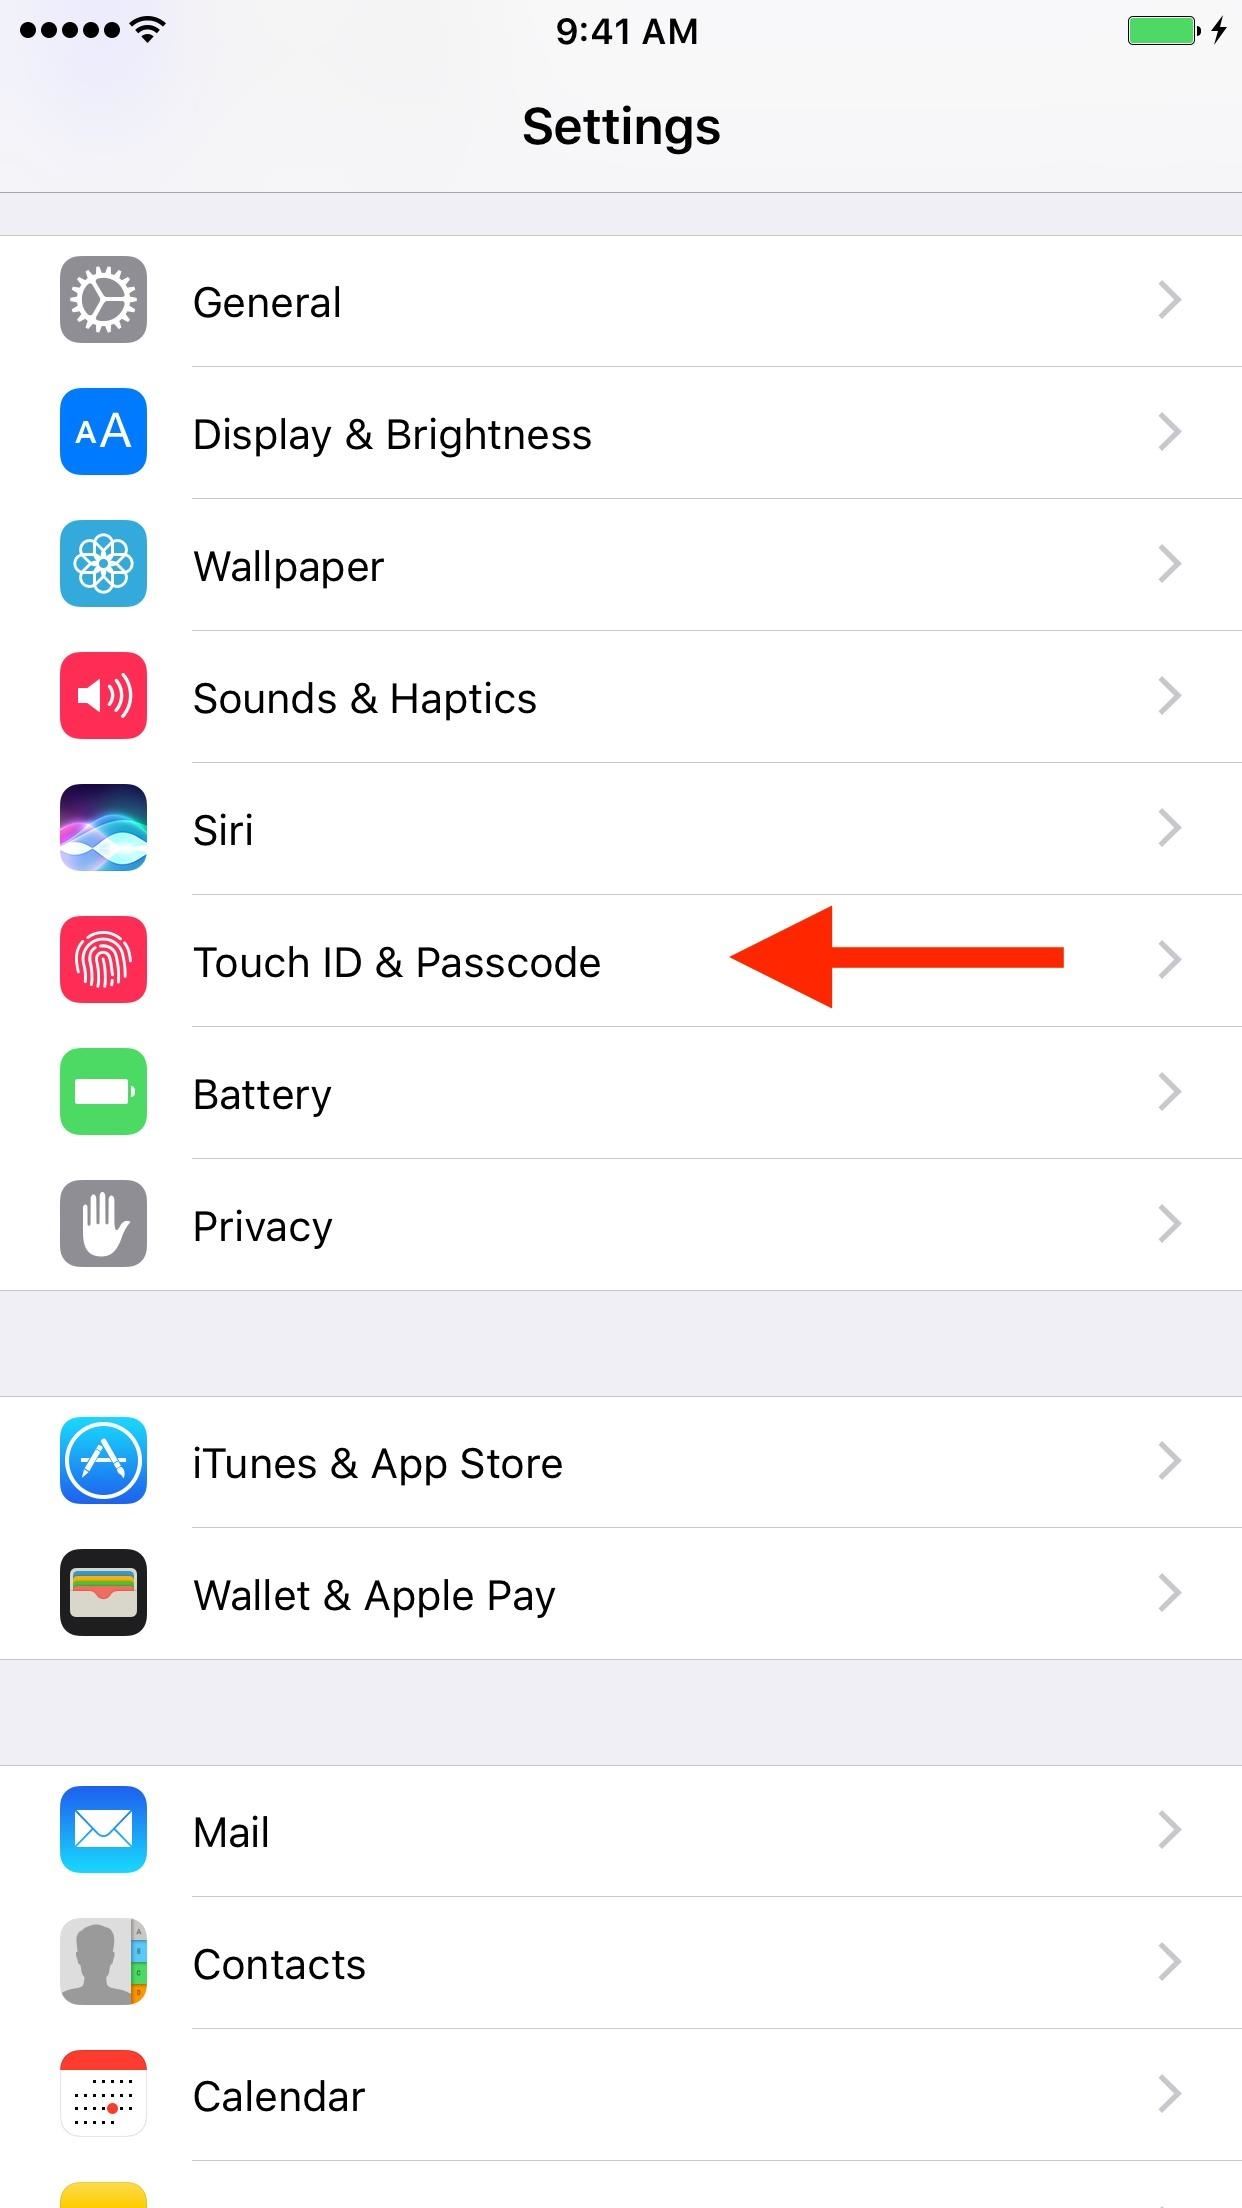
Step 1: Make Your iPhone's Passcode Super StrongTo get started, head to the Settings app on your iPhone and choose "Face ID & Passcode," "Touch ID & Passcode," or just "Passcode" from the list of options, depending on how new or old your iPhone is. From here, tap on "Turn Passcode On." If you've already set a passcode and just want to make it stronger (like, if you only have a four-digit passcode), you can choose "Change Passcode" instead.Don't Miss: 8 Passcode Tips for Keeping Everyone Out of Your iPhone On the following screen, you'll be asked to input your current passcode if you're changing it before you can continue. If you're setting one up for the first time, you'll jump right in, and you'll be asked to create a six-digit numeric passcode, as long as you're running iOS 9 or higher.Don't Miss: How Thieves Unlock Passcodes on Stolen iPhones Six digits is an absolute minimum for security purposes, and it will be tough for anyone to break into. With six numbers, there are one million different combinations, which is much stronger than the meager 10,000 that a four-digit numeric passcode provides.However, to make a really strong passcode, we suggest choosing "Passcode Options" on this screen and choosing either "Custom Numeric Code" or "Custom Alphanumeric Code." If you choose "Custom Numeric Code" and create a 10-digit number code, that's 100 million different possible combinations. Make it 11 and you'll have a billion different possibilities. Choose the alphanumeric options and just imagine how much stronger your passcode can be, since you'll not only have numbers but uppercase and lowercase letters and special characters.If choosing an alphanumeric one, make sure to check out Null Byte's guide to making passwords stronger for ultimate security on your iPhone. We also have some more tips for passcode security on Gadget Hacks.Don't Miss: How to Create Stronger Passwords (Advice from a Real Hacker) It should go without saying, no matter which option you end up going with above, that you don't use common passcodes such as 123456, password, or even passw0rd. You also should avoid using patterns, birth dates, repeating digits, years, your social security number, phone numbers, addresses, favorite pets, or anything similar. Random is the best way to go.If you end up going with some crazy long passcode, you might want to record it in a password manager such as LastPass, so that you never forget should you need it.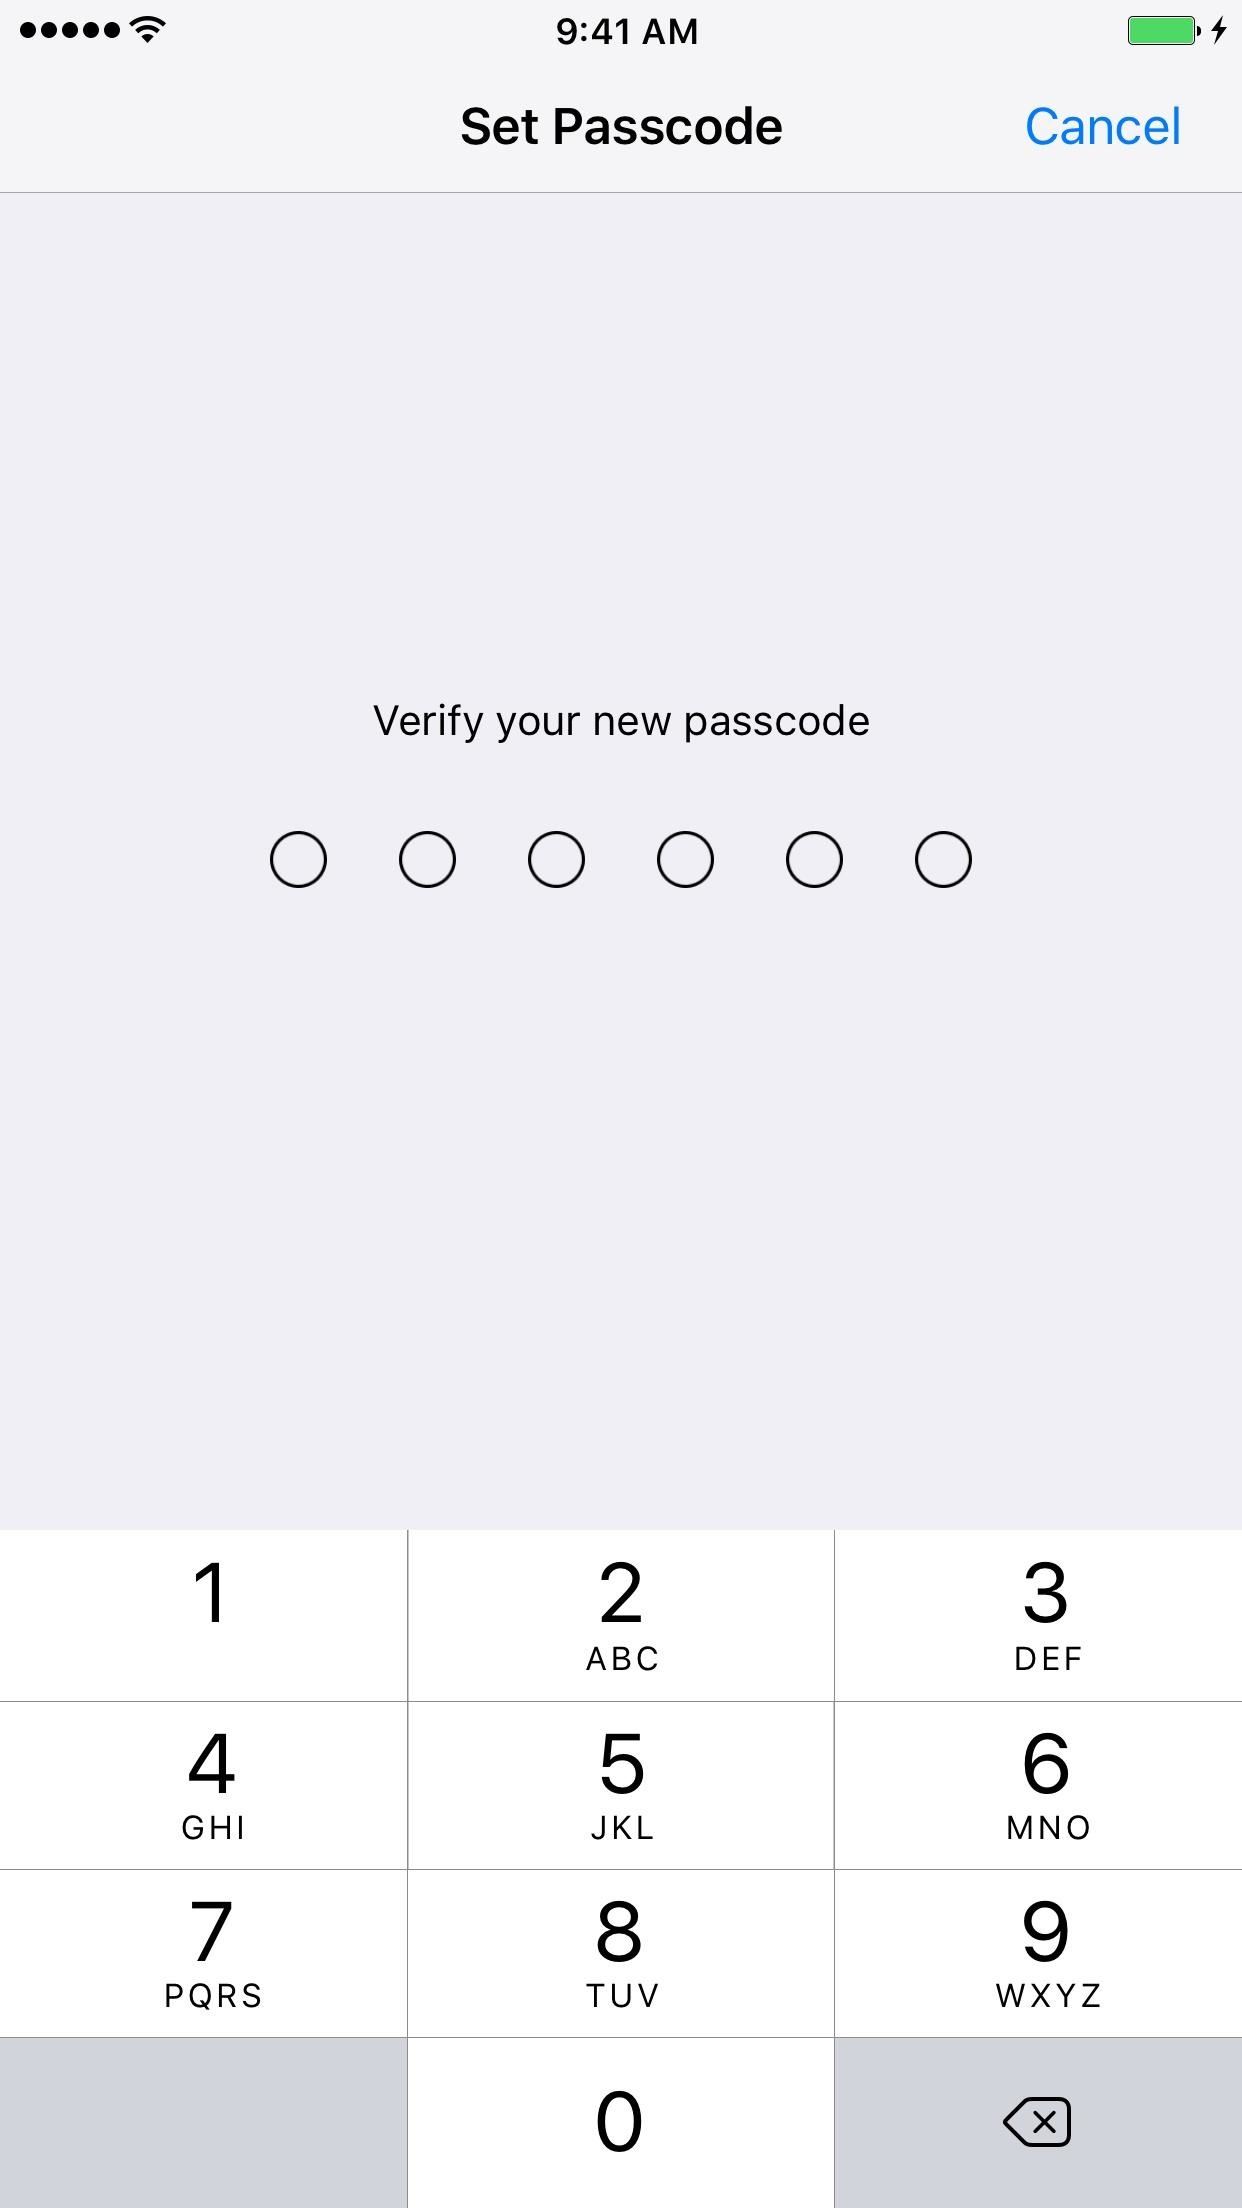
Step 2: Set Your New PasscodeOnce you've chosen your new passcode above and entered it onto the "Set Passcode" screen, you'll be asked to confirm your new passcode, so go ahead and do so. Afterward, you're all set.However, you might get a prompt asking you to use your new passcode to change your Apple ID password from your iPhone. We suggest skipping this prompt as it makes it easier for thieves and the like who gain entry into your iPhone to also possibly gain access and take over your Apple/iCloud account. So hit "Cancel." Canceling this prompt means that you'll either have to use security questions or two-factor authentication to confirm your identity and change your Apple ID password, should you need to.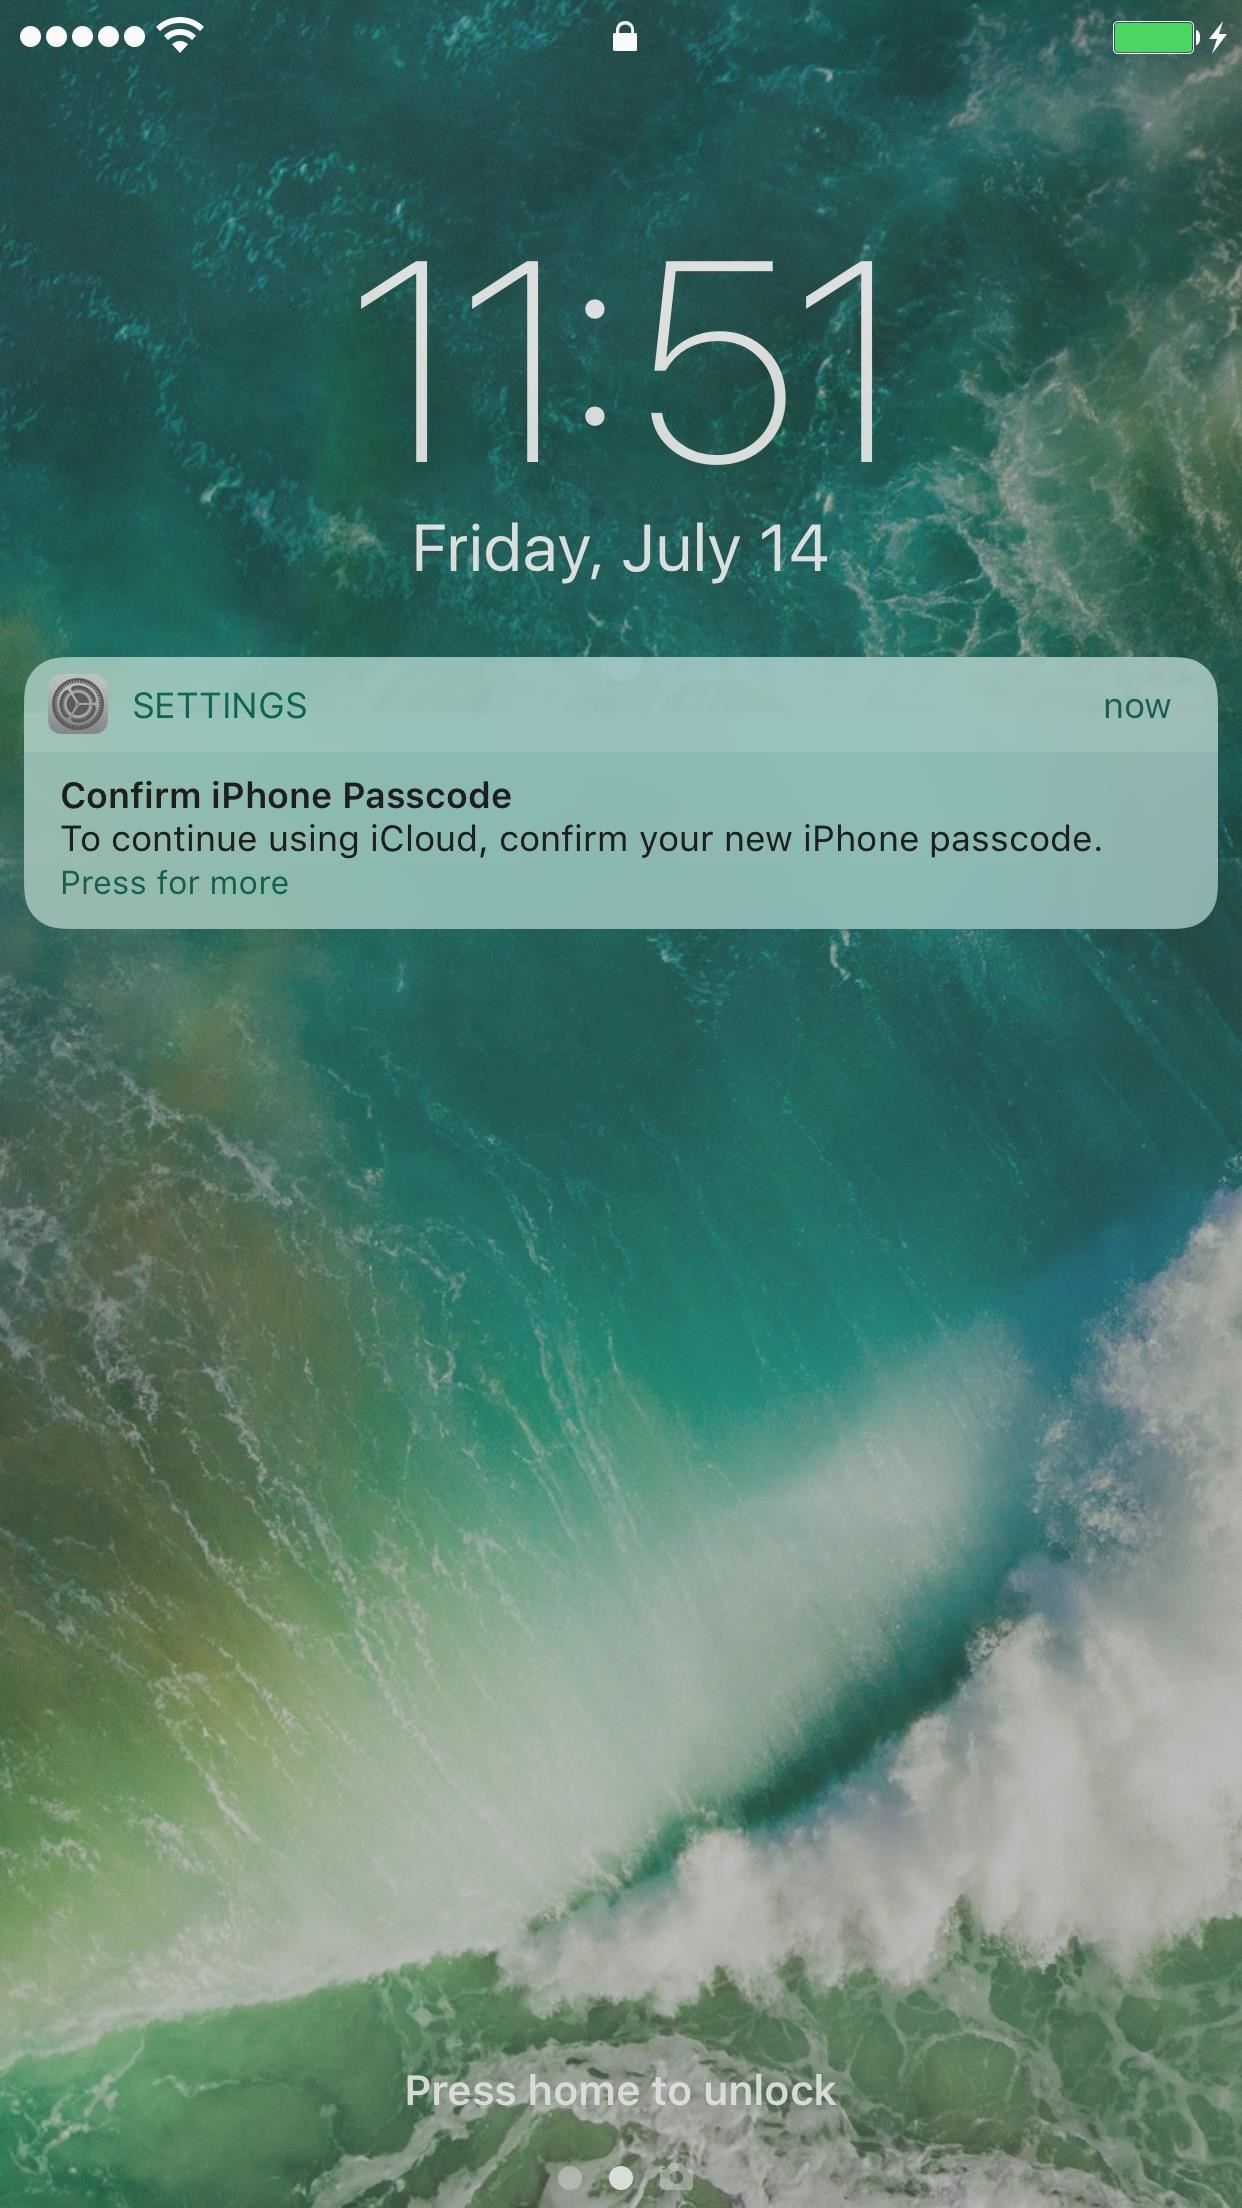
Step 3: Confirm Your New Passcode (If Necessary)If, for some reason, you decided to make or change your passcode while you were either not connected to a cellular data network or a Wi-Fi hotspot, then after successfully adding or changing your passcode, Apple may give you a "Confirm iPhone Passcode" notification that says: "To continue using iCloud, confirm your new iPhone passcode."You can ex out of this notification if you want, but you'll still see it at the top of the page in your Settings app. To get rid of this "suggestion," make sure you're connected to the internet, then tap on the notification or go to your Settings app and tap on the alert below your name. On the next screen, tap on "Continue," then enter your Apple ID password.If you have two-factor authentication turned on for your Apple account, you'll be prompted to enter your iPhone passcode also. Doing this means your iPhone passcode "will be used to confirm your identity when signing into iCloud on a new device." However, it should be noted that if you confirm your iPhone passcode this way, that you will be able to change your Apple ID password using your iPhone's passcode. Remember in the previous step when we skipped that part of the setup when adding/changing a passcode? Well, despite what it says in the screenshot above, this will also do what we didn't want before.So, it's imperative that you're connected to your iCloud account while completing Step 2 so you don't have to go through this. If not, you can fix it by going back into your passcode settings, selecting "Turn Passcode Off," then turning it back on and following Step 1 and 2 again above, making sure that you're online and signed into iCloud.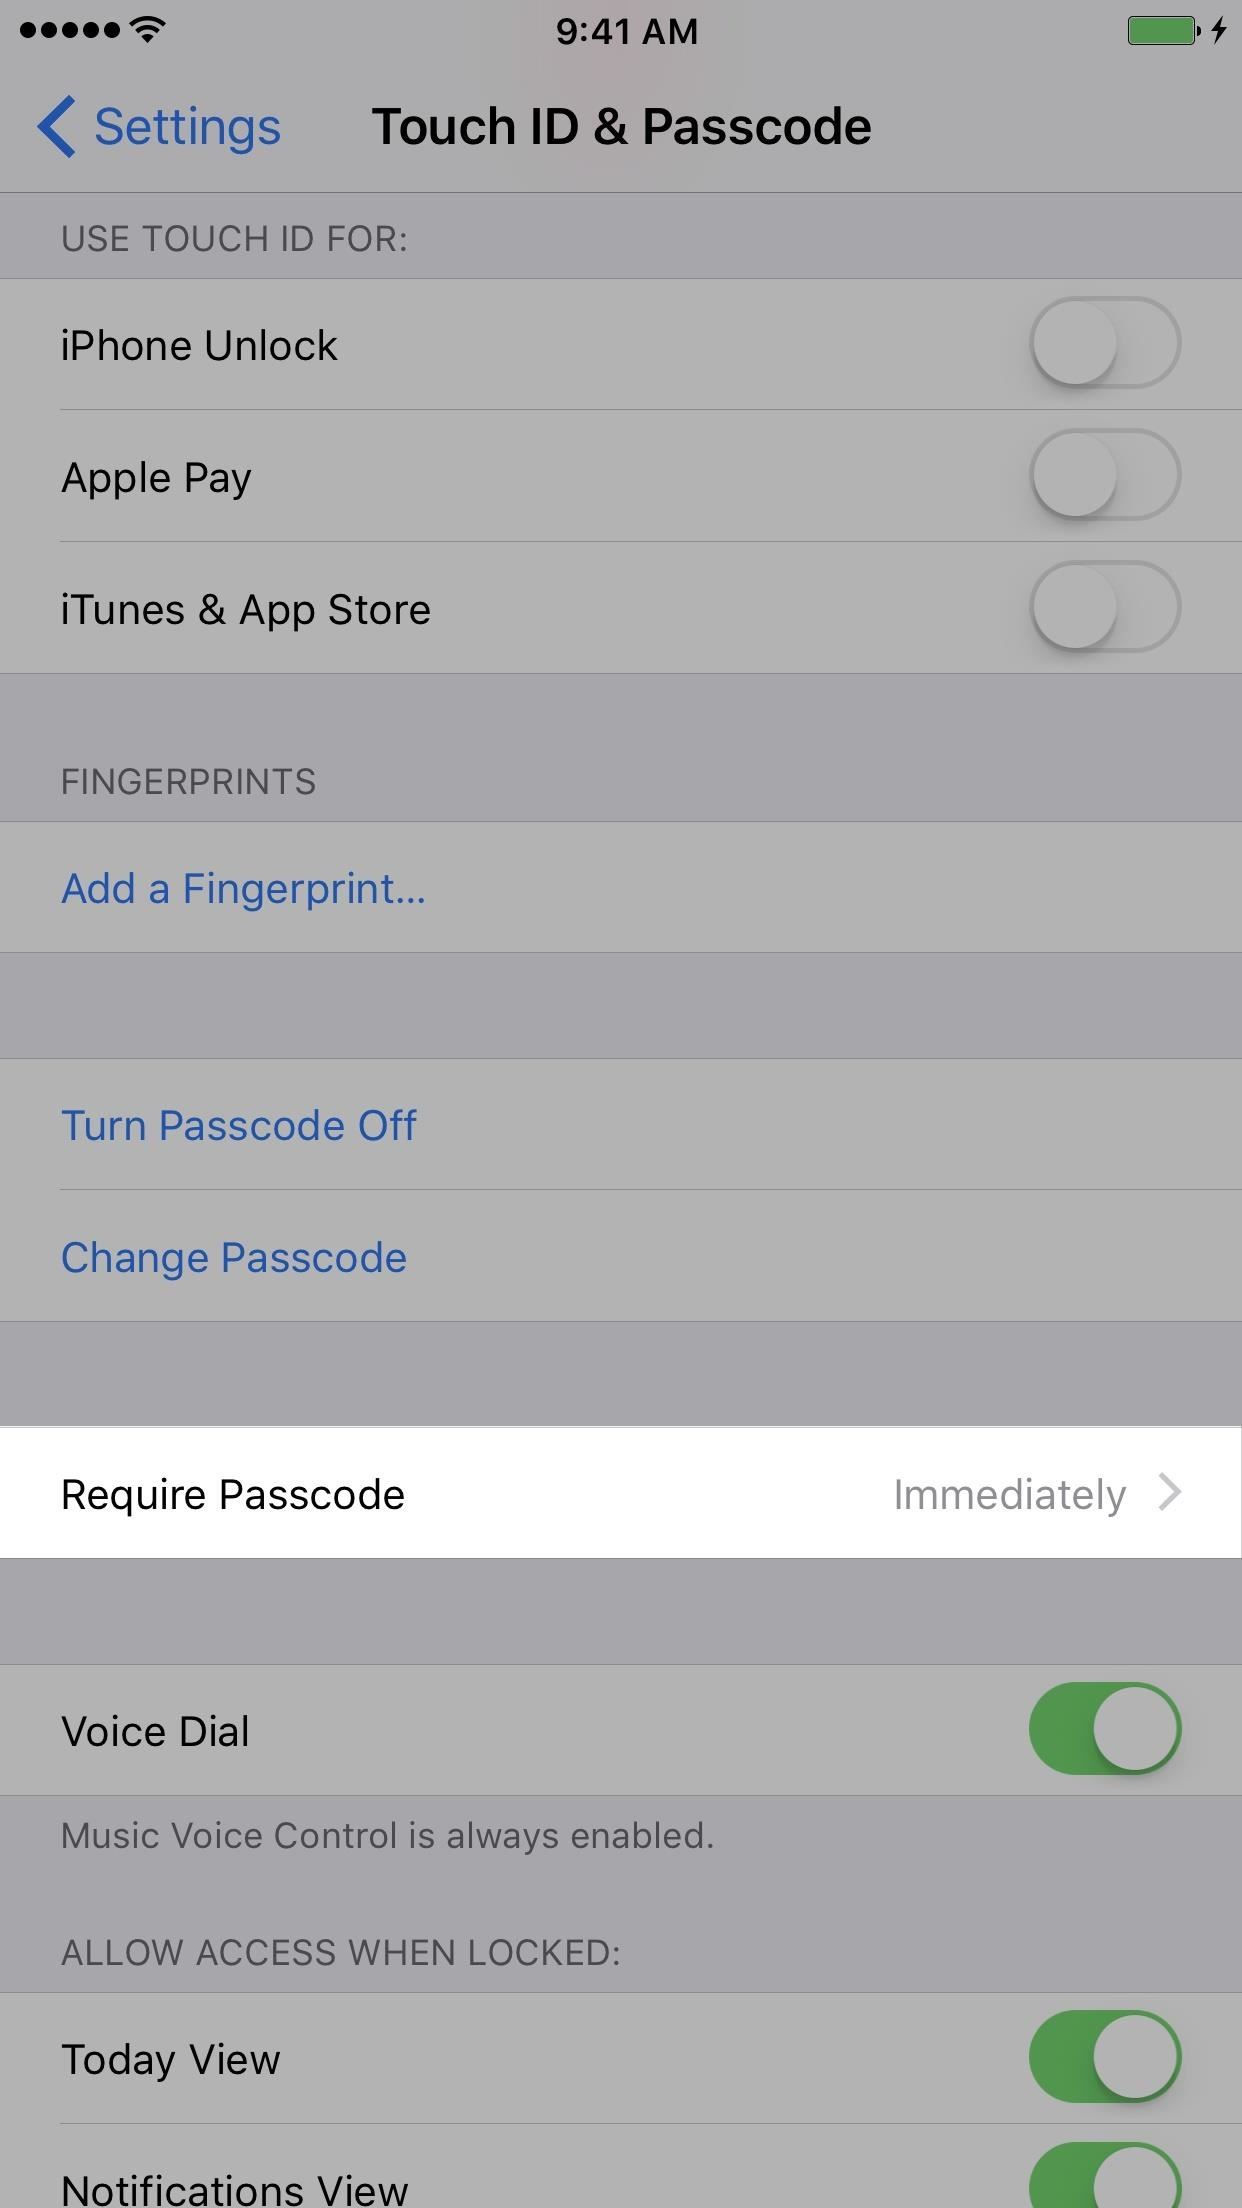
Step 4: Beef Up Your iPhone's Security Even MoreA strong passcode is great to protect your iPhone from unwanted intrusion, but you shouldn't stop there. From the same Passcode settings screen seen above in Step 1, you can decide whether to lock your iPhone immediately after the screen turns off or after a set amount of time by tapping on "Require Passcode."We suggest "Immediately" for the best security, which is the default. This means that whenever your screen turns off, that you'll need to enter your passcode to unlock it. If you use Face ID, Touch ID, or Apple Pay, you cannot change this setting, as it will always be needed immediately. Speaking of Face ID and Touch ID, you should be using it if you have a supported device, as it's much safer (though not infallible) than entering your passcode each time with someone lurking over your shoulder. Face ID has one-in-a-million odds that an intruder can unlock the device while Touch ID maxes out at one in 50,000.To set up Face ID, from the "Face ID & Passcode" settings, select "Set Up Face ID," and follow the instructions. After you're done, you'll be able to use your face instead of a passcode to unlock your iPhone, use Apple Pay, or buy things from iTunes and the App Store, among other things.Full Guide: Set Up Face ID on Your iPhone X, XS, XS Max, or XR To set up Touch ID, from the "Touch ID & Passcode" settings, select "Add a Fingerprint," and follow the instructions. After you're done, you'll be able to use your finger for everything mentioned above for Face ID.Don't Miss: How to Make the Touch ID Fingerprint Sensor Work Better You should also be using two-factor authentication, which you can get to by tapping on your name up top in Settings, then "Password & Security." On the next screen, tap on "Turn On Two-Factor Authentication" and follow the prompts. After you're done, if you get stuck on "Verifying," you can force-close Settings then tap on the alert when you open it back up (similar to the one in Step 3 above), enter in your Apple ID password, then your iPhone passcode. While this last section is completely optional when it comes to security on your iPhone, especially since this article is about creating a stronger passcode, I urge you to consider some of these options. And these aren't your only options ... you can lock down your lock screen even more by disabling the Control Center, Notifications View, Siri, and more.Don't Miss: How to Disable Siri on Your iPhone's Lock ScreenFollow Gadget Hacks on Pinterest, Reddit, Twitter, YouTube, and Flipboard Sign up for Gadget Hacks' daily newsletter or weekly Android and iOS updates Follow WonderHowTo on Facebook, Twitter, Pinterest, and Flipboard
Cover photo and screenshots by Justin Meyers/Gadget Hacks
In iOS 12, this functionality also appears when sending a quick-reply message, and it works the same way. Don't Miss: The Top 10 New Features in iOS 12's Messages App for iPhone; Whenever you receive a text notification on your lock screen, press it using 3D Touch (or just tap it on an iPhone SE or 5S) to fast reply.
How to Secretly Send Text Messages in Class or at Work
How To: Get Around the Nonexistent iPhone 5 Dock How To: Build a custom iPod/iPhone dock out of K'Nex Four Isn't Enough: How to Add an Extra Application to Your iPhone or iPad Dock How To: 5 Ways to Improve the Bluetooth Experience on Your Samsung Galaxy
LEGO iPod iPhone Dock / Charger - WonderHowTo
In this softModder tutorial, I'll be showing you how to save previously watched Snapchat photos and movies onto your rooted Samsung Galaxy Note II or other rooted Android device.
How to Secretly Save Snapchat Photos - Samsung Galaxy Note 2
Make the right calls and watch your club become the Ultimate Team. ATTACK TO WIN Take on thrilling matches that drop you into your offensive possessions with VS Attack mode. This innovative level of competition kicks your game into high gear while you strive to dominate 90-second matches, climb the leaderboards, and earn seasonal rewards year
As you can see, there is a plethora of apps that help you tame your monitor at night, thus making it easier to work at night while reducing dazzle and eyestrain. I only mentioned apps that I consider worth it, but might have missed some others. Jump in the comments to let us know which is your favorite one!
Dim or reduce brightness of laptop or computer monitor screen
How to Take Screenshots on an Android. This wikiHow teaches you how to take a snapshot of your Android's on-screen content. You can do this on any Android phone by pressing a combination of hardware buttons, though some Samsung Galaxy phones have slightly different hardware options than their counterparts.
How to Record the Screen on an Android Device | Digital Trends
In this article we show how to use an iPhone to scan a QR code, Spotify code, Facebook Messenger Code or Snapcode. Apple News Apple Reviews Apple How To Macworld Magazine Apple Deals Mac
QR Code Reader and Scanner on the App Store - iTunes - Apple
Anonymous Browsing with Tor. Tor (the Onion Router) is an online network for encrypted and anonymous communication. Tor functions similarly to internet browsers, such as Firefox, Safari, and Chrome. However, as opposed to the other browsers, Tor allows you to browse anonymously. The Tor network consists of thousands of servers worldwide.
4 Ways to Browse the Internet Anonymously on Your iPhone
Samsung Galaxy S7 notification panel is a centralized location for all notifications from all apps on your Galaxy S7 and Galaxy S7 edge. This guide applies to Galaxy S7 edge notification panel as well, although Galaxy S7 notification panel is used in the guide.
Notification Panel - Samsung Galaxy S5 User Guide
eguides.sprint.com/support/eguides/samsunggalaxys5/content/samsung_galaxy_s_5_ug/notification_panel.html
Notification Panel. The Notification panel displays details about your phone's status, and it provides easy access to common settings and features. Use the Notification Panel. Open the Notification panel by swiping your finger down from the Status bar at the top of the screen. On the Notification panel, you have these options:
Samsung Galaxy S4: How to Re-Arrange Notification Panel
How to find, install, rearrange, and delete apps on your
If you are looking to add a picture file or logo to your Gmail signature without using any third-party service or application, there is a very simple process to do so. This tutorial will walk you through how to add an image to your signature, so that everybody can see it. Insert an Image or Logo to
How to add an image to your Gmail signature - New Tricks
Your all-time favorite game has finally come to your mobile world. Enjoy playing this outstanding game, and walkthrough the different challenges and events of course with one of the highest 3D qualities out there. Read and use our FINAL FANTASY AWAKENING Hack, cheats, tips and guide in order to learn more about the available classes […]
Final Fantasy Awakening - youtube.com
0 comments:
Post a Comment