How To: Hack the Motorola XOOM Android Tablet (Rooting Guide)
Whether it's the new iPad Killer or not, one thing's for sure—the Motorola XOOM is hackable. Just hours after its release last week, Verizon's new Android-based tablet (running Honeycomb) was rooted by hacker Koushik Dutta, which seems easy enough."Since it's another Google experience device, and ships with fastboot support (albeit, limited), it really does come rooted out of the box. Just needed to figure out the board kernel base, and compile up a new kernel."To learn how to root your new Motorola XOOM tablet, just follow Koushik's directions below. If you prefer to keep your XOOM as is, take a gander at all the XOOM has to offer with the Android 3.0 operating system.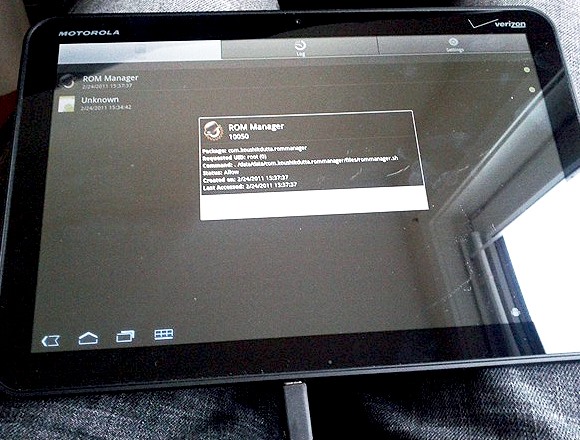
WarningIf you root your device now, you will NOT be able to upgrade to 4G LTE from Verizon. Rooting the XOOM will void your warranty and it will not be upgradable to their upcoming 4G LTE service. Click here for information on upgrading your XOOM.In order to root the Motorola XOOM, you will need adb (Android Debug Bridge) and fastboot installed on your computer.Step 1 Download USB driversTo get started, you'll need to first install the Motorola XOOM's USB drivers, which you can get here or here.Step 2 Download the Android SDKadb is contained within the Android SDK, and is a tool that lets you manage the state of an emulator instance or Android-powered device.It is a client-server program that includes three components:A client, which runs on your development machine. You can invoke a client from a shell by issuing an adb command. Other Android tools such as the ADT plugin and DDMS also create adb clients. A server, which runs as a background process on your development machine. The server manages communication between the client and the adb daemon running on an emulator or device. A daemon, which runs as a background process on each emulator or device instance. Download the Android SDK for your operating system (Windows, Mac OS X or Linux). If you need help on installing the SDK, check out the step-by-step instructions.Once installed, you can find the adb tool in <sdk>/platform-tools/. Or directly in the tools folder of the Android SDK folder.Step 3 Download fastbootIn addition to the adb tool above, you'll also need to get the command-line fastboot tool to flash the system image of the device. Flashing your device in this way is useful if you need to install the radio and system images independently or you are already familiar with fastboot and are using it successfully in your environment. To use this method, your device must have a fastboot-compatible bootloader. Having the original factory bootloader included on ADP devices is not required. If you insist on compiling the code yourself, the fastboot source code is available in the Android open source repository and is compiled whenever you build from that tree. If you've built from the Android open source tree, you will find the fastboot executable in this location:<build-dir>/out/host/<platform>/bin/But if you don't want to bother with that, just download the fastboot executable directly at the HTC Developer website.Step 4 Download the XOOM root fileYou can get XOOM root ZIP file right here, which is built with the tegra: stingray kernel.Step 5 Unzip the packageUse an un-zipper tool like WinZip or Apple's built-in support for unpacking ZIP files. It includes three files: rootboot.img, su, and Superuser.apk.Step 6 Power Off the XOOMMake sure your XOOM is connected via USB and then power if off.Step 7 RebootIn order to reboot, press the volume down and power buttons at the same time. Don't release the buttons until you see "Starting Fastboot protocol support" in the upper left-hand corner of the XOOM display.Step 8 Open up a terminal windowOpen up a terminal window (or command prompt if on Windows) and navigate to your Android SDK "tools" folder (inside the Android SDK folder, where you installed that to) where fastboot resides. Then enter the command:fastboot oem unlockStep 9 Unlock the XOOMOn your XOOM's display, you should see a warning message asking if you want to continue unlocking your device. Doing so will void the warranty. Press the volume down button until it states "Yes", then press the volume up button to beginning unlocking. Wait for a reboot.Step 10 Enable USB Debugging and rebootOnce your Motorola XOOM has rebooted, connect to a Wi-Fi network or Verizon's network, but avoid setting up a Google account on your new Android tablet. Then, go to Settings > Applications > Development and enable USB Debugging.Reboot your device using this command in your terminal window:adb reboot bootloaderStep 11 Flash the boot imageIn the command prompt, use this command to flash the new boot image with fastboot:fastboot flash boot rootboot.imgStep 12 RebootIn the command prompt, reboot your device using this command:fastboot rebootStep 13 After rebooting...Wait for the XOOM to reboot to the lock screen. In the terminal window, input the following commands (hitting Enter after each one):adb remountadb push su /system/bin/adb shellln –s /system/bin/su /system/xbin/suchmod 4755 /system/bin/suexitadb push Superuser.apk /system/app/Step 14 VerifyTo check and make sure you had a successful reboot, enter adb shell into the command prompt and you'll get a # prompt.And that's it—the Motorola XOOM is now rooted with the Superuser app.
WarningsThe Motorola XOOM's microSD card slot is not active. A future software upgradewill enable this device to support microSD cards up to 32GB. So keep in mind, due to nonfunctional microSD card slots in the device, you won't be able to recover your device, at least not until they release a firmware update that enables the slot. I'm guessing it won't get the firmware update until it's ready for 4G LTE.For updates on a working recovery, check on Koushik Dutta's website.ROM Manager support will come as soon as the microSD card slot is updated, free and premium versions.Never accept a Verizon or Motorola update after rooting!
Photo by Dutta, katmere, thefredelementSOURCE My Brain Hurts VIA Android Central
Two Ways To Change Your Android Boot Animation [Android Tip
Culture How to take time-lapse photos on Android. Share a series of photos with friends and family--time-lapse style. Just follow these steps.
android app for taking photos automatically at regular
How to Install Android 4.4 KitKat Launcher - Duration: 3:50. Phone Tech Kid 44,965 views. Update & Install Official Stock Firmware ROM on Samsung Galaxy S Duos - Duration: 11:13.
How to install Android KitKat on Samsung Galaxy S3
Set Any Song As Custom iPhone Ringtone (without Jailbreak) Creating custom ringtones for your iDevice isn't difficult, all you need is a bit of knowledge, an iDevice, iTunes and a USB Cable
Add Songs, Custom Ringtones to iPhone Without iTunes
Go to your Apple ID account page and click "Forgot Apple ID or password." If asked to confirm your phone number, use steps for two-factor authentication instead. Enter your Apple ID, select the option to reset your password, then choose Continue. Did you forget your Apple ID? Enter your Recovery Key for two-step verification.* Choose a trusted
It's probably a good idea to check Disable Settings button so that people can't access them through the lock screen, but again, this is all about choice.. Other preferences are mainly for non-Nexus devices, such AOSP Style Pulldown, which is the swipe down left or right action we discussed earlier—these won't apply for us as we are already running AOSP.
How to Add Custom Widgets to the Lock Screen on Android
How to edit photos using VSCO. By now you have a basic overview of the various camera settings that are available to you, so now let's look at the photo editing capabilities of VSCO. The photos you take using VSCO will be saved to your VSCO library (accessible by tapping the cross in the lower left of the screen or by swiping upwards on the
VSCO Tutorial 2017 (Favorite VSCO Presets/Filters
Just like the recently rediscovered Star Wars ruins in the Tunisian desert, there are tons of hidden treasures in your Samsung Galaxy Note 2 just waiting to be unearthed. Rooting enables you to install custom ROMs, exclusive features from other devices, add Wi-Fi tethering, overclock the CPU for faster speed, and many other customizations.
How to Root Your Samsung Galaxy S3 (And Flash Stock ROMs
How To: Unhide App Purchases on Your iPhone in iOS 11
How To: Get the Pixel's Navigation Buttons & Google Assistant Animation on Your Nexus How To: Get the Pixel's 'Zero Shutter Lag' Camera with HDR+ Features on Your Nexus How To: Get Moto X-Style 'Active Display' Notifications on a Samsung Galaxy S3 News: Christmas Is Coming Early! Android 7.1 Beta Is Hitting Nexus Devices This Month
Samsung Galaxy S7 Always-On Display Vs Motorola Active
May 16, 2017 · Face filters for adults too "There's a lot of exciting work being done around augmented reality," an Instagram spokesperson said when asked about the app copying Snapchat's face filters.
Interview with Dvoshansky - The Creator of Flying Face
Every time I use Rapidshare, MegaUpload and other hosters for downloading important files, I'm stuck with lots of issues. Not to mention - slow download speed, downloading limits and lots of troubles.
How to search and download files from MediaFire - Quora
Regardless of your reasoning, there's no better way to restore the stock firmware on a Samsung device than using Odin, which is a firmware flashing tool for Windows. There's a bit of prep work that you'll need to do in order to get things going, but beyond that, it's actually an incredibly easy process.
How to Unroot and Completely Restore Back Samsung Galaxy
Apple released a recent update to the iOS operating system called the iOS 5 firmware. iOS 5 has been the biggest firmware update yet, with around 200 new features for iPhone, iPod touch and the iPad. Additionally, a number of extra multitasking gestures were also included for the iPad 2 version of the iOS 5 firmware.
How To Enable Multitasking and Wallpaper on an iPhone 3G
0 comments:
Post a Comment