How To: Everything You Need to Disable on Your Galaxy S9 for Privacy & Security
Smartphones are like high tech buckets that collect our personal information through constant use. This has some obvious benefits, like getting a more personalized experience with our devices. On the other hand, this data is a tempting target for bad actors looking to make a buck at the expense of your privacy.There are numerous threats to watch out for when it comes to your privacy and security. Hackers are ever-present and will exploit any holes in your armor to steal your private data. One the flip side of the coin, law enforcement can arbitrarily subpoena your phone when it suits their needs. Even a friend looking over your shoulder and seeing private information can have serious repercussions.Thankfully, your Galaxy S9 has your back. It comes laden with settings and features specifically developed to keep your valuable personal data as private as possible. You may have some of these settings adjusted properly already, but they're still worth a good look-over to be safe. Below are all of the settings you need to check out to protect your device from unwanted access.Jump to a section: Antivirus | Location | Alerts | App Access | Anti-Theft | Google
1. Malware ScanningIt's always a good idea to routinely scan your phone for malware and viruses. Luckily, your S9 has a built-in virus scanner to help you perform this vital task with relative ease. Best of all, the feature has the ability to run scans in the background so you can continue on with what you were doing without missing a beat. Settings > Device care > Security Open the above menu and tap on "Scan Phone" to start scanning for malicious software. The security scanner will then proceed to comb through each third-party and system app to look for anything out of the ordinary, and either give you a "Secure" signal if no viruses are found, or provide you a report detailing issues it spotted, along with steps you can follow to resolve them.
2. Location HistoryIf you breezed through your S9's initial setup, you probably gave your phone permission to log your location history. If you're unaware, this feature constantly tracks your movements, and can be accessed at any time by going to this link and signing in with the Google credentials you use on your phone. The information is only visible to you, but you'll probably want to disable this feature if you find it a little too creepy for comfort. Settings > Biometrics and security >
Location > Google Location History Once you've accessed this setting using the menu above, you can disable the feature by toggling the switch in the center of the screen. A confirmation prompt will appear once you toggle Google Location History off, so tap on "Pause" to confirm, and you're all set.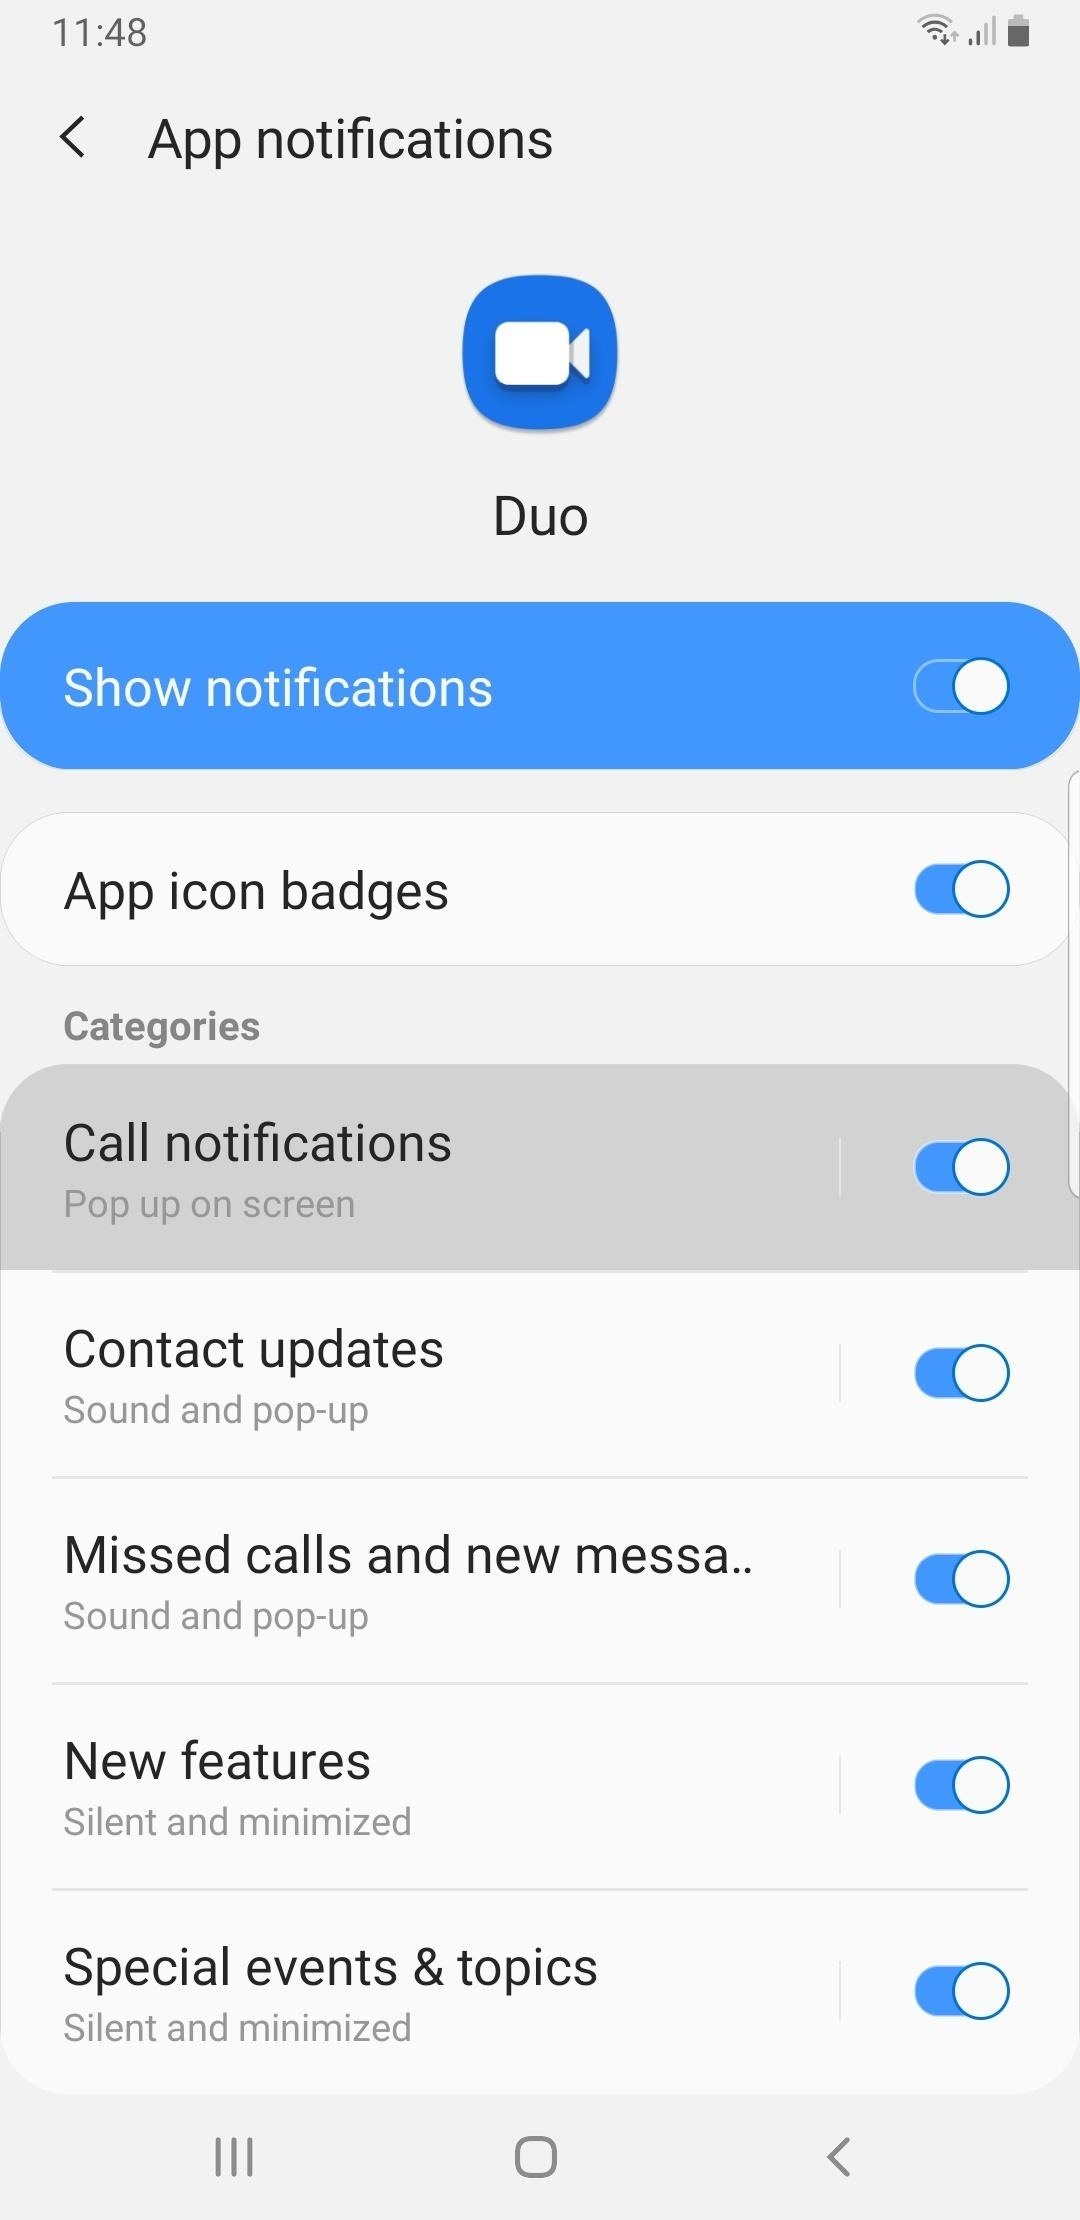
3. App NotificationsIt's always a great idea to set the notification settings for certain apps to private and keep prying eyes away from your device. For this, you'll need to go to the "Notifications" menu in Settings and disable the toggle switch next to each app to prevent it from showing notifications altogether. Settings > Notifications Some apps let you receive notifications silently, so if you want an app to notify you, but in a more private manner, this is the option to choose. To do so, tap on the app's name to go to its menu. From there, tap on specific notification elements for the app under the "Categories" section, then hit "Notification style" on the following page and choose "Silent and minimized" from the overflow menu.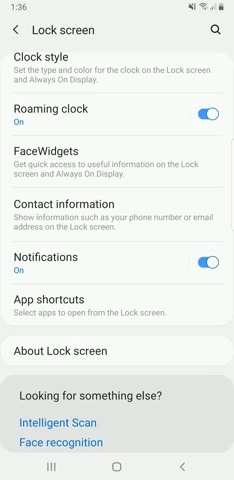
4. Lock Screen NotificationsNotification previews that appear on your lock screen can also be cause for some concern. If not properly set, these lock screen previews can easily be seen by others if you're not paying attention, which could potentially lead to privacy concerns. Settings > Lock screen > Notifications You have several ways to proceed from the above menu. First, you can disable lock screen notifications altogether by toggling the switch at the top of the screen. You can also hide the content of notifications (the actual message) by enabling the switch next to "Hide content," or you can take things a step further by enabling the "Notification icons only" setting.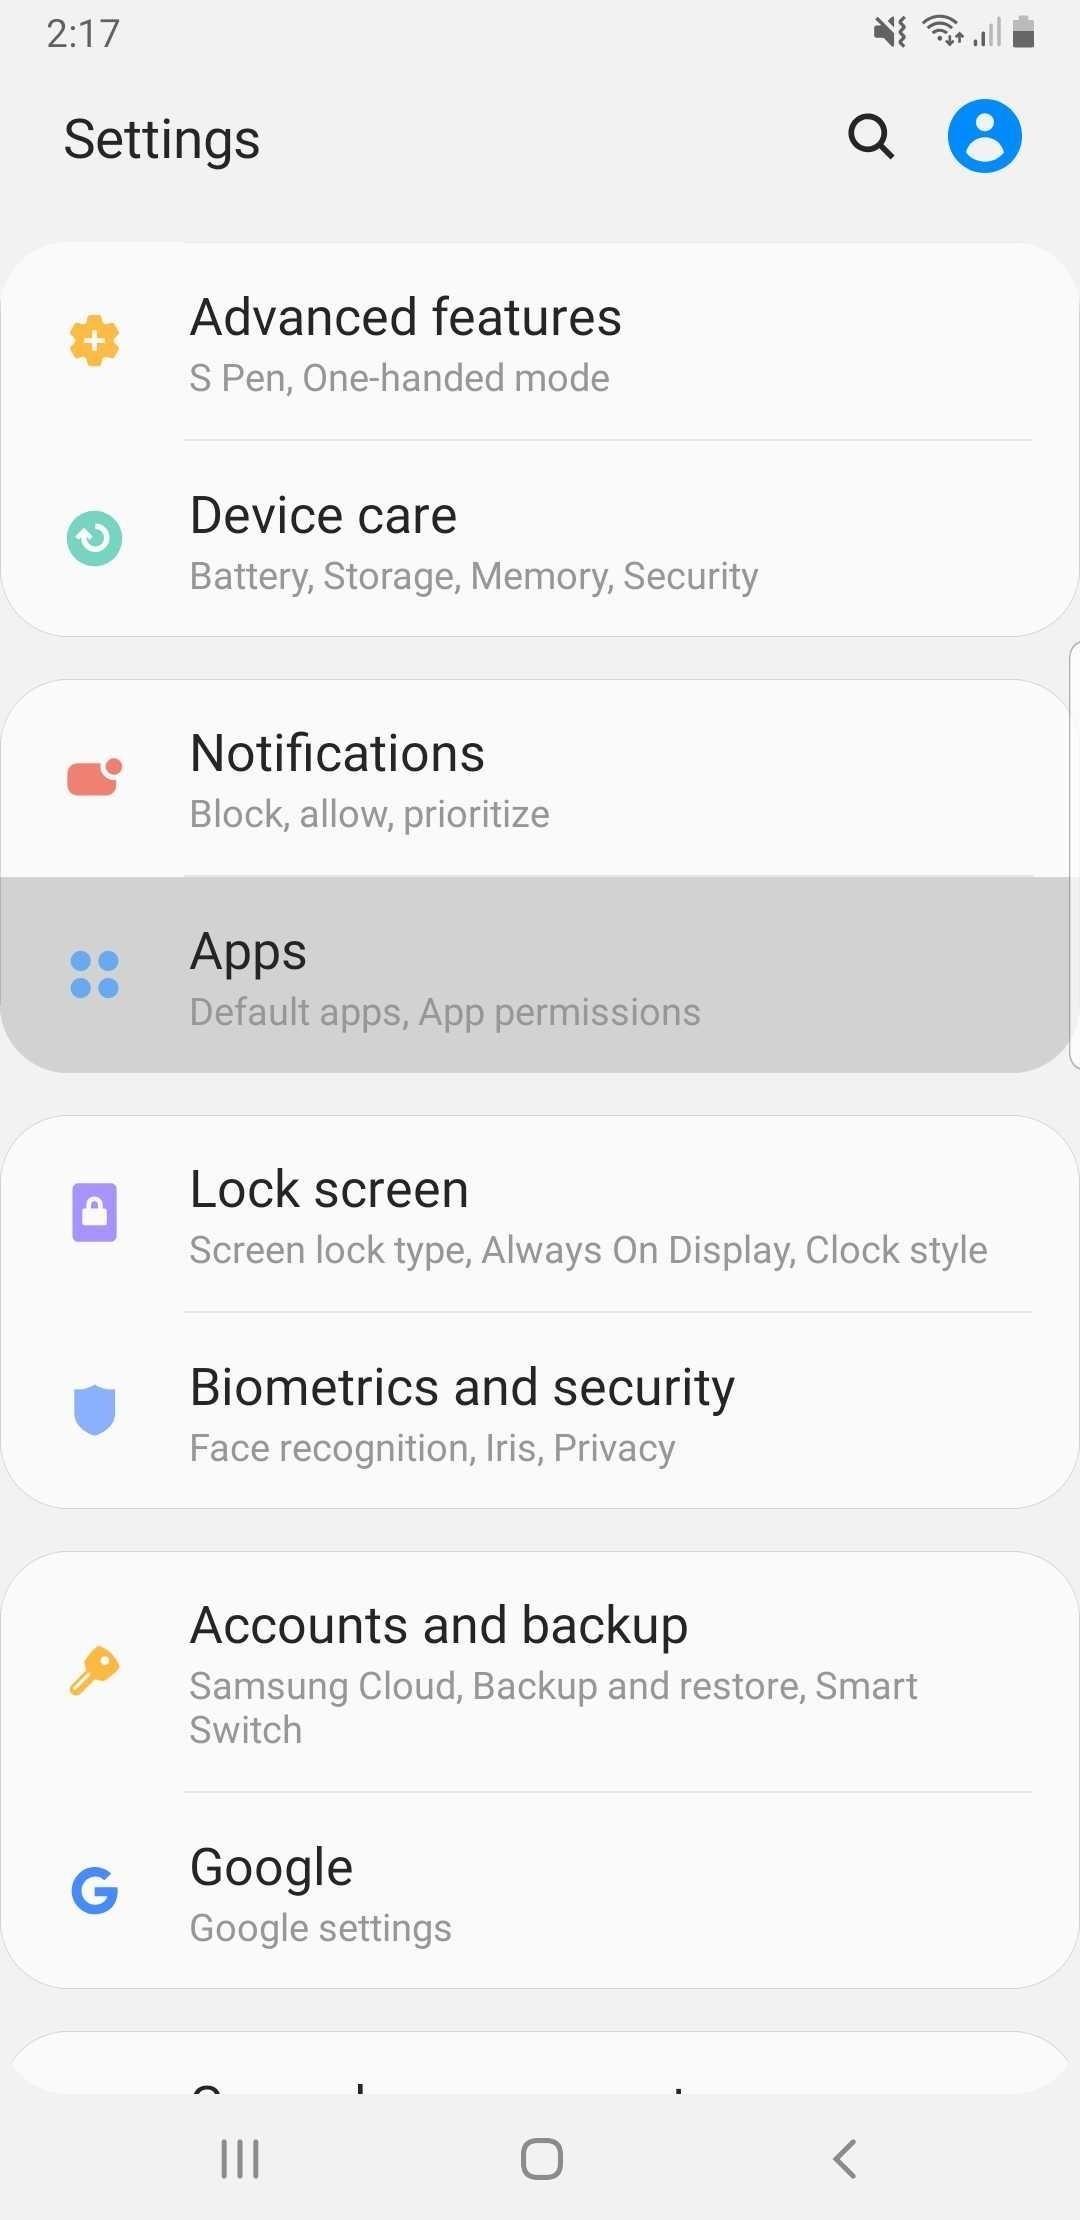
5. Notification AccessCertain apps require access to your device's notifications for legitimate reasons. WhatsRemoved, for instance, records WhatsApp notifications as they come in so you can view them in the event they're deleted by the sender. While notification access is needed by some specialized apps, most don't need this level of access to work properly. Settings > Apps > Menu button >
Special Access > Notification access Follow the menu above, and once you reach "Notification access," simply disable the feature for any apps you deem suspicious.
6. Camera, Microphone & Location AccessNewly installed apps you're opening for the fist time will often walk you through a couple of brief introduction pages to show off their features, then issue prompts that ask you to give them access to vital functions like your S9's camera and microphone. If you rushed through the setup process, however, you may have given the app permission to access sensitive data it doesn't need. Settings > Apps > Menu button >
App permissions If you're unsure of how much access you've given an app, you can always revisit its settings through the above menu. From here, you'll see a list of all of the data that third-party apps can access, with the most sensitive ones being "Camera," "Location," and "Microphone." So tap each of these permission categories one-by-one, then go through the list on the following screen.
7. Device AdministratorsSome Android apps can get slightly elevated permissions by requesting "Device administrator" access, which is great for certain add-ons like ad blockers, but can compromise your privacy in some cases. While you have to explicitly grant apps Device administrator privileges, it's easy to overlook the permission and enable the feature. This can be potentially disastrous, as malware apps love to use the Device administrator feature to prevent you from uninstalling them. Settings > Apps > Menu button >
Special access > Device admin apps So if you want to double check for apps you may have inadvertently granted administrator-level access to, carefully sift through the list within "Device admin apps," and deselect the check marks next to any third-party app that may have it enabled, while leaving "Find My Device" and "Google Pay" alone to make sure they work properly.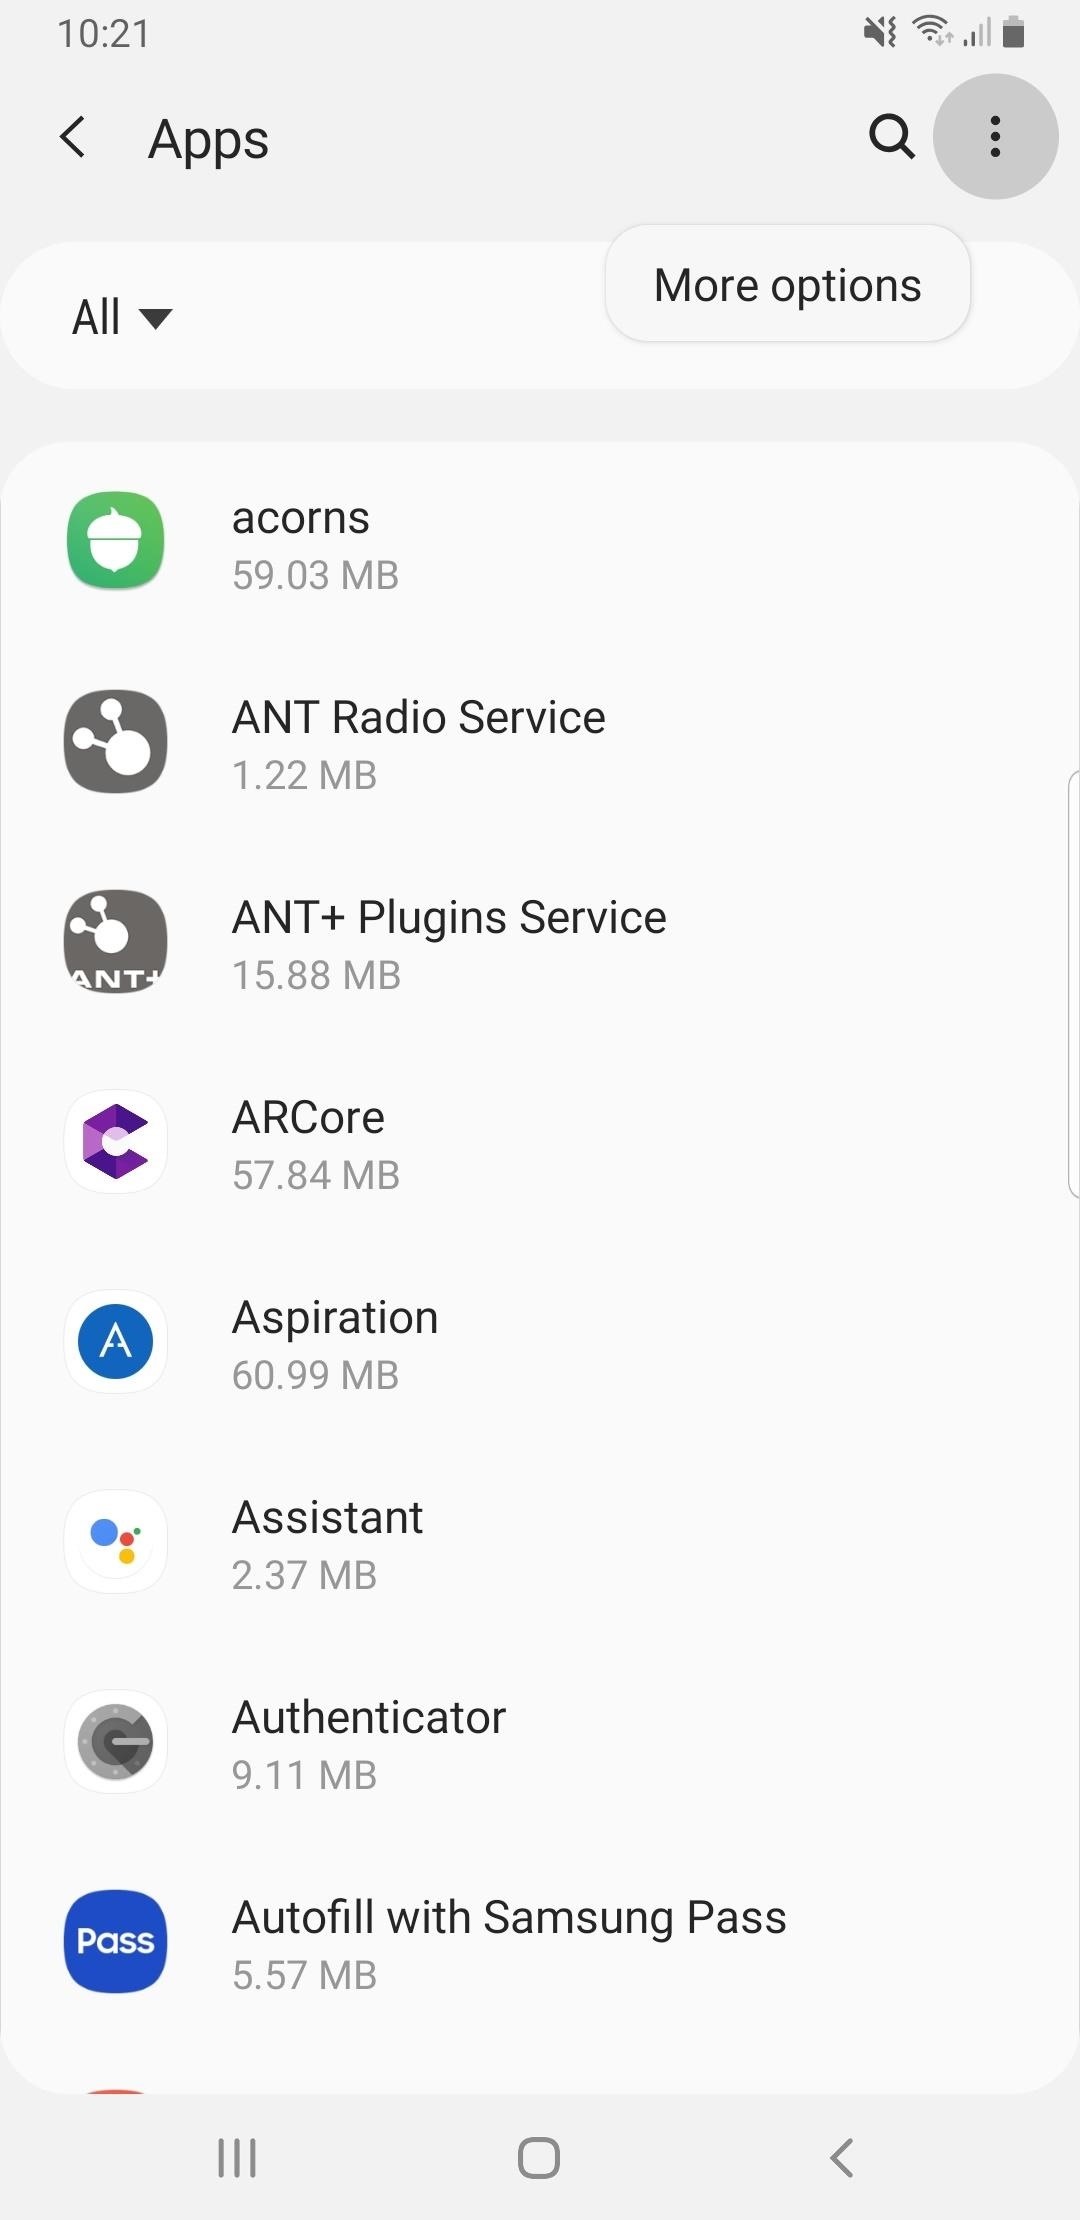
8. Apps That Can Appear on TopSome apps have the ability to apply overlays on top of your S9's screen like record buttons for screen recording apps, Facebook Chat Head bubbles, and things of this nature. Malicious apps, however, can use this feature to trick you into installing malware through sneaky means, such as drawing "Cancel" over the "Install" button on an Android system prompt. Settings > Apps > Menu button >
Special access > Apps that can appear on top Look through each app in this menu, especially third-party apps. If you think an app doesn't need to have this permission this granted, simply tap on the toggle next to the app to disable it.
9. Apps That Can Change System SettingsProductivity apps are usually granted certain Android permissions to access system settings on the fly. Voice assistant apps like Bixby, for instance, use this permission to turn your GPS off when you say "Turn off GPS." Obviously, having this level of access granted for a questionable app can negatively impact your privacy and security. Settings > Apps > Menu button >
Special access > Change system settings Carefully look through the list in the above menu, paying close attention to third-party apps. From there, tap on the toggle next to each app you want to revoke the permission from to turn the feature off, and you're good to go.
10. Usage Data AccessIn an effort to enhance your overall experience, some apps will ask for permission to view data about the way you interact with your phone. This can range from monitoring the types of apps you use and how often they're accessed, all the way to your cell carrier's name and language settings. This can be a bit creepy if you hadn't already realized it. Settings > Apps > Menu button >
Special access > Usage data access Give the list within "Usage data access" a good look over and disable the feature for any third-party app by tapping on it and hitting the toggle found within the following page. Just be sure to not disable the feature for native apps and services like Game Launcher, Samsung Pay, and Google Play Services to ensure they work properly.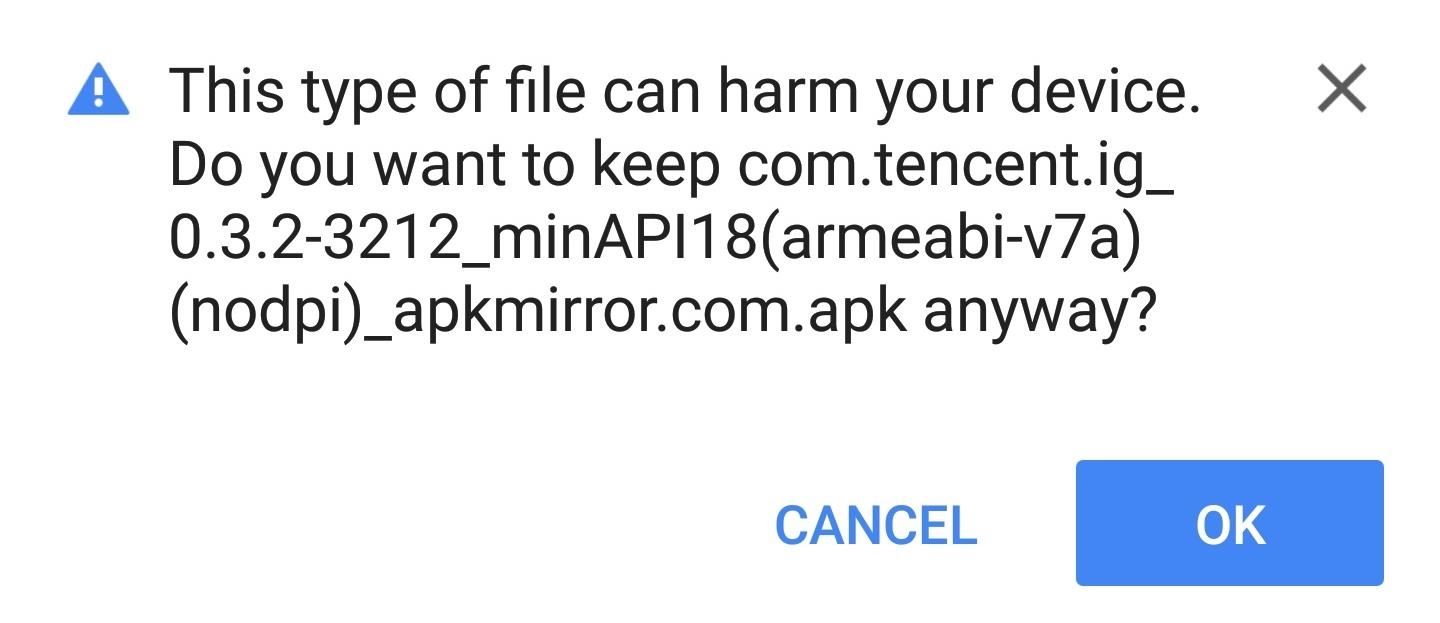
11. Install Unknown AppsSideloading apps from sites outside of Google Play or Galaxy Apps can expose your S9 to potential Android malware. As such, being extremely careful when installing APK files can't be stressed enough, especially now that the "Unknown Sources" feature can no longer be found on the S9.To help keep your device safe from malware, we recommend downloading external apps through browsers such as Chrome that require you to confirm your downloads through permission prompts. Samsung Internet is now also a viable option, as it now asks your confirmation via a prompt on the Pie-based One UI, a feature not available on its Oreo-based version. Besides that, it's also worth noting that some apps have the ability to install unknown apps that may potentially harm your device. If you download APKs through Chrome or Samsung Internet, it would make sense for these apps to have this permission — but other random apps on your phone probably shouldn't. Settings > Apps > Menu button >
Special access > Install unknown apps Use the above menu to get started, then tap on the three-dot menu button in the upper-right corner, select "Special access" from the overflow menu, and tap on "Install Unknown Apps." Inspect which apps have this permission, then select any apps you want to deny access to by turning off "Allow from this source."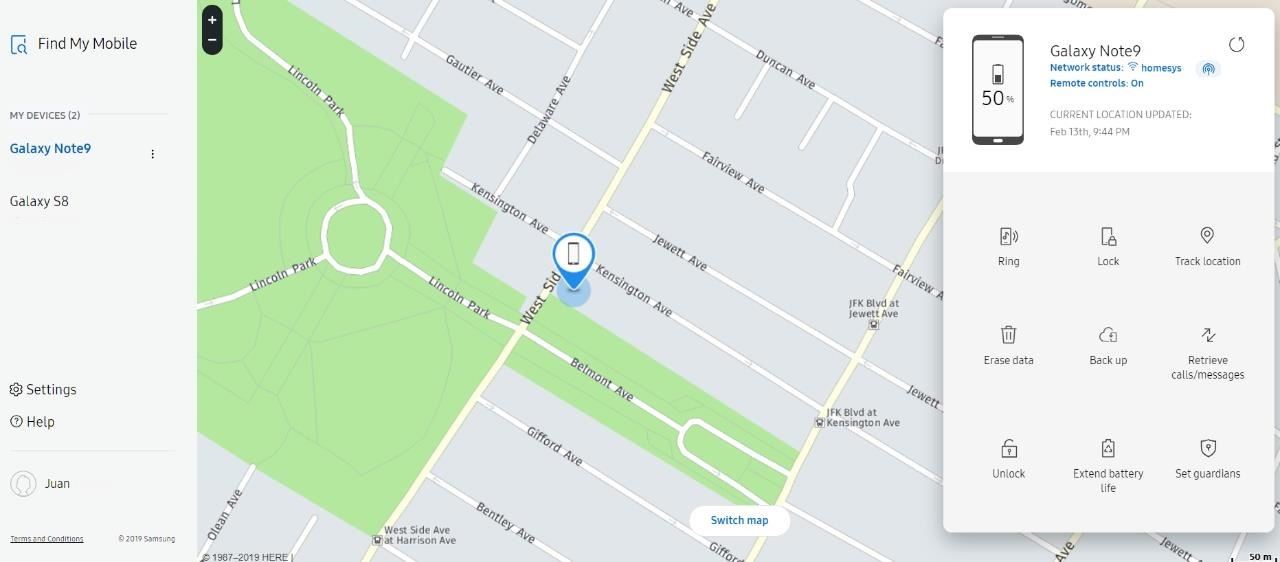
12. Find My MobileSimilar to Google's Find My Device, Samsung's Find My Mobile feature gives you a slew of options to protect your privacy in the event your S9 is lost or stolen. Besides helping you locate your phone, the security feature lets you remotely lock your phone's screen, power button, and Samsung Pay. Beyond that, it also lets you sign out of your accounts and completely wipe its storage if your phone can't be recovered. Settings > Biometrics and security >
Find My Mobile From the above menu, make sure the toggle at the top of the screen is turned on. Once that's done, you'll be able to access Find My Mobile by visiting its website and entering the login for your Samsung account.
13. Intelligent ScanThe Galaxy S9's Intelligent Scan feature now combines face and iris scanning to make for a more secure way to unlock your device. As great as this combined biometric security feature is, however, it still pales in comparison to the advanced Face ID feature found on the iPhone XS, which means you should still stick with the tried-and-tested fingerprint sensor if you want to keep your S9 as secure as possible. Settings > Biometrics and security >
Intelligent Scan So if you want to be extra safe, visit the above menu to access the settings for Intelligent Scan, then input your PIN when prompted. From there, tap on "Intelligent Scan unlock" to disable it. Once you're done, be sure to set up a fingerprint lock screen that's complimented with either a PIN or password from the same "Lock screen and security" menu.
14. Face Recognition & Iris ScannerApart from Intelligent Scan, the S9 lets you use Face Recognition and Iris Scanner separately. Unfortunately, using these features on their own makes your device more susceptible to unauthorized access due to spoofing with photos either of your face or your eyes. You can disable these features in the exact the same way as turning off Intelligent Scan. Settings > Biometrics and security >
Face recognition or Iris
15. Smart LockThe S9 has a centrally-located fingerprint sensor on its rear panel. However, reaching around the device to unlock it via fingerprint on the rear isn't always as convenient a front-mounted sensor, which has forced many us to rely on quicker means to access our devices. "Smart Lock" is one popular alternative that keeps our phones unlocked whenever we're in a trusted location.Unfortunately, taking advantage of this feature exposes you to some privacy and security risks. Because your phone remains unlocked any time it's within range of a trusted location or a paired device, you leave your device wide open for just about anyone to pick up and access anytime you leave it unattended. Settings > Lock Screen > Smart Lock Visit the above menu to access the settings for Smart Lock. From there, disable the "Trusted devices" setting by deleting any devices shown. It may also be worth disabling "On-body detection," "Trusted places," and "Trusted voice" to maximize your security and privacy.
16. Google Data CollectionAndroid is a Google product, so your phone's operating system comes standard with Google-based features like Gmail and Google Maps that collect data from your device to further personalize your experience. If you'd rather keep your data private, however, Google gives you the option to limit its data collection for account-based services in a few easy steps. Settings > Google > Google Account >
Data & Personalization > Activity controls Following the menu above, there are numerous settings you can access within "Activity controls," like "Web & App Activity" which you can turn off to keep Google from collecting information about sites you go to while using its search engine, and apps that you use on your device. Disabling "Device information" prevents Google from saving your calendar and contacts on its cloud-based servers."Voice & Audio Activity" trains Google Assistant to recognize your speech habits, which you can also disable here if you find the feature creepy. Besides that, you can also disable YouTube history and overall device location history to maximize your privacy. Keep in mind that turning these features off will result in decreased functionality in Google apps.
17. Ads PersonalizationAdvertisements are Google's bread and butter, and the tech giant uses data collected from your S9 to give you targeted ads to better reflect your wants and needs. While Google never shares your smartphone habits with third parties, the "Ads Personalization" feature allows third-party apps to access your advertising ID, which they can then use to build their own profile on you. Settings > Google > Ads >
Opt out of Ads Personalization Following the menu above to opt out of Ads personalization will stop external apps from tracking you to some extent, but Google will still be able to build a personalized ad profile based on your data. While you can't stop this altogether (short of installing a custom ROM), you can periodically delete your ad profile from Google's servers by resetting your advertising ID. To do that, tap "Reset advertising ID" in this same menu, and try to do this every month if you can.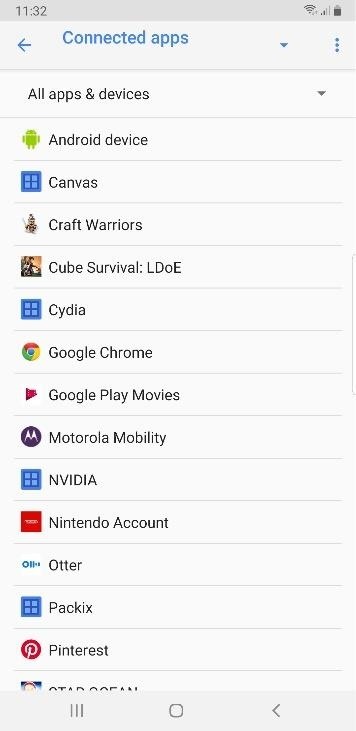
18. Connected AppsMany apps and services require you to enter your Google credentials, whether it be for verification purposes, instant access, or unlocking additional features. However, at a minimum, the "Sign in with Google" option gives these third-party services access to basic personal information associated with your Google account, so it's a good idea to make a habit out of flushing this data out from time to time. Settings > Google > Connected Apps So, visit the above menu and carefully comb through the list. Select all of the apps, services, and websites that you're no longer using on an individual basis, then tap "Disconnect" on the following screen and confirm your choice on the popup. Also, be sure to play it safe and repeat the process for any entry that you don't think should have access to your Google account and all the vital data that comes with it.
19. NearbyTo make device pairing more streamlined, Google has come up with the Nearby feature which lets you quickly pair with smartwatches, ear buds, and other gadgets without finagling with your Bluetooth settings. That's not all, as the feature also allows for external services and locations like retail stores to communicate with your phone to offer you relevant ads and discounts.Though this feature has yet to gain traction, there may come a time where your S9 will get bombarded with ads and offers for items and services like Colgate toothpaste and movie tickets as you pass by stores and theaters while strolling around. Naturally, the potential for more unwanted ads will likely be more annoying than exciting, so you might want to disable this feature. Settings > Google > Nearby So, head to the menu above and hit toggle at the top of the screen to disable the feature, just bear in mind that doing so will kill the Fast Pair feature found on some Bluetooth headsets. If you want to keep this functionality while heading off potential ad notifications, hit the gear icon at the top of the Nearby menu, select both "Links" and "Popular Links," then disable the "Show Notifications" toggle for both.
20. App Preview MessagesApp Preview Messages is a feature developed by Google that lets you receive notifications from apps you haven't installed on your S9. Google Duo is a great example of this feature in action, in which a person sending you a text message (or video call) using the app yields a message notification on your end inviting you to install and use the app. Settings > Google > App Preview Messages Of course, the potential for receiving unwanted messages can drastically increase with this feature enabled, so if you want to stave off future headaches, follow the above menu and simply tap on the toggle switch at the top of the screen, then press "OK" on the popup to turn off the feature.This article was produced during Gadget Hacks' special coverage on smartphone privacy and security. Check out the whole Privacy and Security series.Don't Miss: The 4 Best Phones for Privacy & SecurityFollow Gadget Hacks on Pinterest, Reddit, Twitter, YouTube, and Flipboard Sign up for Gadget Hacks' daily newsletter or weekly Android and iOS updates Follow WonderHowTo on Facebook, Twitter, Pinterest, and Flipboard
Cover image by Jon Knight/Gadget Hacks, screenshots by Amboy Manalo/Gadget Hacks
If you've noticed a tiny discolored spot on your computer screen that just doesn't seem to go away, chances are you have a stuck pixel. With modern LCD and OLED screens, there are millions of incredibly small dots (pixels) that make up all of the contents of your display—and within these pixels, there is a set of red, green and blue subpixels.
Pixel 2 XL's blue screen tint likely caused by poorly applied
How to turn your Android phone into a spy camera. If you own an Android device, there are a ton of apps you can use to accomplish your camera needs. Getting and installing the software on your
How to Turn an Old Android Device into a Security Camera
CNET is the world's leader in tech product reviews, news, prices, videos, forums, how-tos and more.
Best Buy | Official Online Store | Shop Now & Save
Relinquishing control of anything important is never easy but, in the right circumstances, doing just that can be so very worthwhile. If you don't believe me, give indoor skydiving a try. Indoor skydiving - or body flying - has all the fun of freefall, while being safely suspended in a lovingly crafted wind-tunnel.
Consumer News Archives - consumerqueen.com
Windows 10 offers several ways to back up and recover your data. One toolset that you might be used to from Windows 7 is the ability to create a full system image backup.
How to Make a Full System Image Backup on Windows 10
I was able to obtain the original iPhone (2G) from a relative for my own use. I reset everything on the phone and updated to firmware 3.1.2. Once I got the phone running I noticed that I don't have the Cellular Data Network option in Settings>General>Network.
Fix iPhone Cellular Data Problems by Resetting Network Settings
osxdaily.com/2010/01/11/fix-iphone-cellular-data-problems-by-resetting-network-settings/
If an iPhone is experiencing cellular connectivity and cellular data issues or problems, you may be able to resolve your cellular or general network data problems with a relatively simple trick, which is to reset the iPhone Network Settings. This article will show you how to do just that.
iPhone: "Could Not Activate Cellular Data Network"; fix
SyncMate is a handy and powerful synchronizator, which allows synchronizing Contacts, Calendar, Bookmarks, Mail, Notes, ToDos's, multimedia files and other data between your Mac and Windows Mobile device. SyncMate is offered at two Editions : Free and Expert.
Activesync Mac: synchronize Windows Mobile Mac
Caller ID Blocking blocks your number from being displayed through Caller ID either permanently or temporarily. It's a free service. Note: You can't block your number from appearing when calling certain numbers, such as 800 numbers and 911.
How To Block Your Number From Caller ID - A New Cell Phone
The Galaxy S8's 'Adapt Sound' Feature Makes Your AKG
Research suggests that as many as about 40% of women and men in the US who are in their 30s and 40s have tried it at least once. Some never try it again. Some do it every now and then. As is being pointed out in this forum, however, few people engage in it frequently. However, everyone is different and if you enjoy it, then have fun!
MakeVR Lets You Create 3D Models in Virtual Reality with Real
How To: Force Restart Your Galaxy S9 or S9+ When It's Acting Up
iOS 9: Cool new features coming to iPhone, iPad, and iPod touch Apple continues refining the appearance and behavior of the software that powers the iPhone, iPod touch and iPad," Michael
All the Cool New Features Coming in iOS 10.3 for iPad, iPhone
This system allows you to browse the Internet without leaving a search history on your BlackBerry KEYone, cookies or temporary files. On the other hand, private browsers retain two things: downloads and page marks. All you have to do is launch a page from your web browser on your BlackBerry KEYone and click on "Menu".
How to Clear Temporary Internet Files on Your BlackBerry
If you have a DLNA player at home that supports media rendering (most of them do) then you can easily upgrade it to stream almost any online video, movie or live tv show.
Facebook Watch
Don't miss all of our CES 2015 coverage! Created by BlackBox Biometrics, the Linx IAS (Impact Assessment System) headband and its companion app for Android and iOS, can provide athletes, parents, coaches, and sports organizations with real-time data and analysis of impact-related head injuries.
How to Wear a Fabric Headband That Goes All Around Your Head
0 comments:
Post a Comment